Our Knowledge Center is your go-to resource for expert guidance on barkdust, soil, gravel, decorative rock, and other landscaping materials. Explore practical articles that explain product differences, best-use scenarios, installation tips, and seasonal yard care advice. Whether you're planning a new project or choosing the right material, these educational guides are designed to help you make confident decisions and get the most out of every product.
A lot of outdoor spaces look fine on paper but never quite get used in real life. The patio sits empty, the lawn feels too open or too high-maintenance, and the yard becomes something you see more than something you actually enjoy.
The difference usually isn’t square footage or budget. It’s how the space is designed, divided, and finished.
Creating an outdoor space you’ll actually use comes down to a few practical choices: defining zones, choosing low-maintenance materials, and making the space feel intentional instead of accidental.
Here’s how to build a backyard that you’ll actually spend time in.
Before thinking about materials or design, start with function.
Ask yourself:
Most usable yards aren’t one big open area. They are divided into smaller, purposeful zones.
Even simple zoning makes a yard feel more intentional and easier to use.
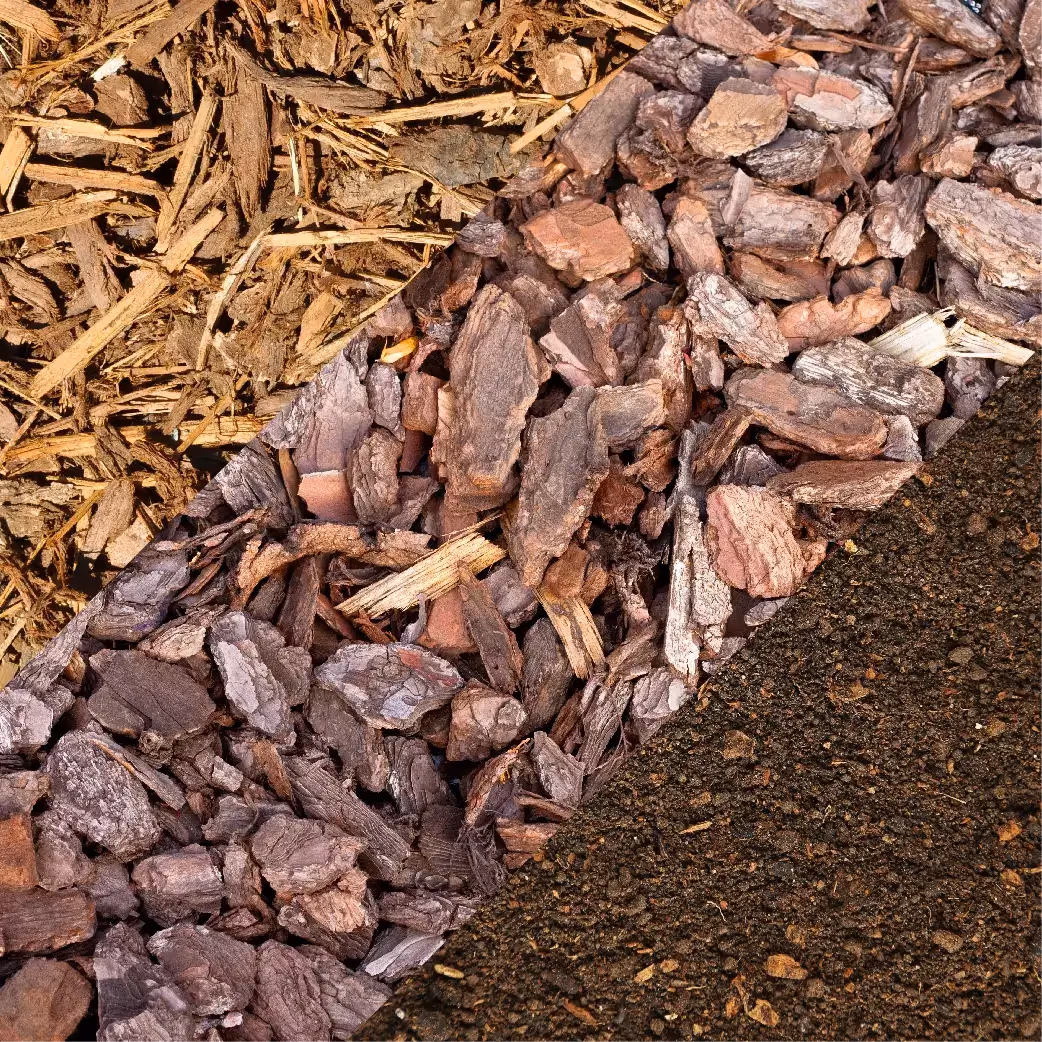
One of the biggest reasons outdoor spaces go unused is lack of definition. When everything blends together, nothing feels “finished.” You don’t need walls or major construction to fix this. Simple material changes can define space clearly.
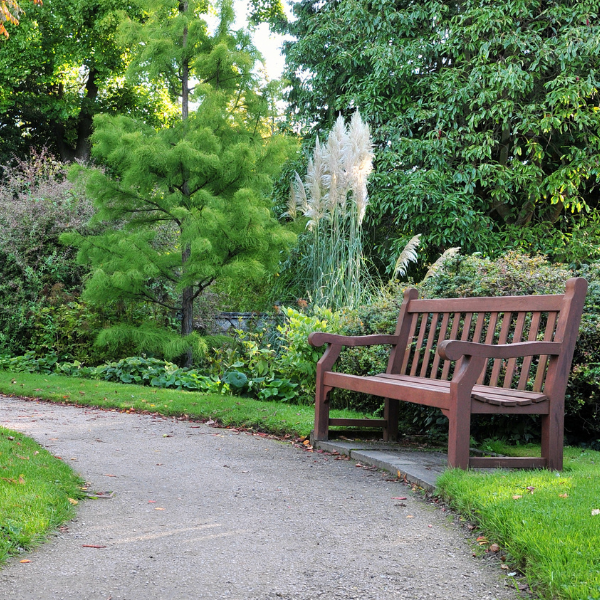
A gravel seating area next to a bark-lined garden bed already feels like two separate, usable spaces instead of one undefined yard.
A backyard feels more usable when movement is natural. Think about how you walk from the house to different areas, where people will naturally gather, and how paths connect spaces.
Even a simple gravel or flagstone path can make a yard feel more functional by guiding movement and reducing “dead zones” that don’t get used. Flow turns a collection of features into a usable space.
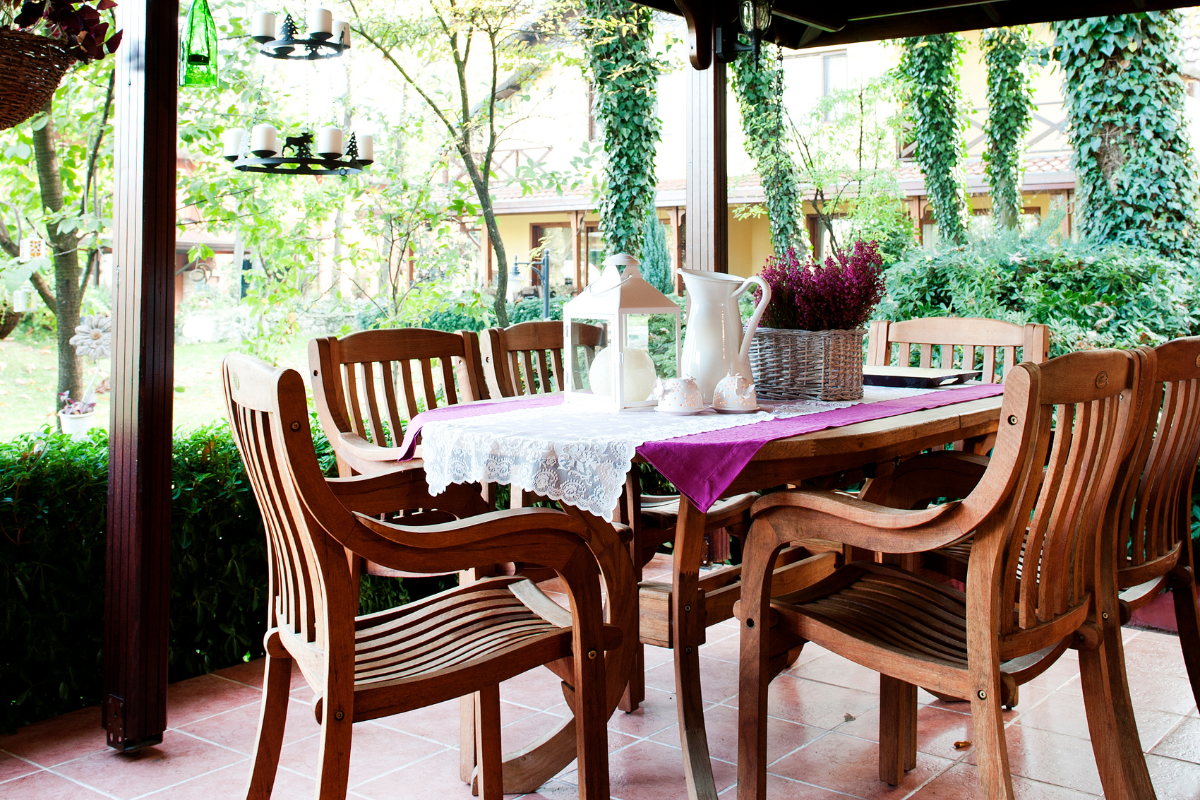
Most outdoor spaces don’t need more features. They need one clearly defined place where people actually want to sit.
That could be:
Once that focal point exists, the rest of the yard naturally supports it instead of competing with it.
The difference between a yard that feels “unfinished” and one that feels usable often comes down to edges. Create clean transitions between, lawn and gravel, beds and walkways, bark and hardscape. These details make the space feel intentional and well maintained, even if the design is simple.
An outdoor space you actually use doesn’t require a full redesign or a large investment. It comes from clarity: clear zones, simple materials, and thoughtful layout.
Gravel creates structure and durability. Barkdust brings softness, definition, and lower maintenance. Together, they turn a yard into a space that feels organized, comfortable, and easy to live in.
If your outdoor space feels underused right now, start small. Define one area. Improve one surface. Add one focal point. Over time, those small changes turn into a yard you don’t just look at, but actually use.
And if you need help choosing the right materials or planning out quantities, Schlegel can help you get it dialed in before you start.
Gravel is one of the most versatile materials in landscaping. It works for driveways, paths, patios, and side yards, and it can look clean and low-maintenance when installed correctly.
But there’s a common frustration: gravel that keeps sinking, disappearing into the soil, or developing soft, uneven patches over time.
When that happens, most people assume they used the wrong type of gravel. In reality, the issue is almost always the base underneath it.
Here’s why gravel sinks and how to fix it so your surface stays stable long-term.
Gravel doesn’t usually fail on its own. It fails because it’s placed on unstable ground.
Over time, three main things cause sinking:
If gravel is placed directly onto dirt, especially loose or organic soil, it will gradually work its way downward.
Rain, foot traffic, and even simple settling cause the gravel to shift into the softer material below.
Without a compacted base, gravel has nothing to sit on.
A proper base layer provides structure and load distribution. Without it, weight from walking, driving, or even watering compresses the gravel into the ground.
Water movement plays a big role in gravel stability.
If water is pooling or flowing under the gravel layer, it slowly carries fine soil particles away and replaces them with voids. Over time, the gravel settles into those empty spaces.
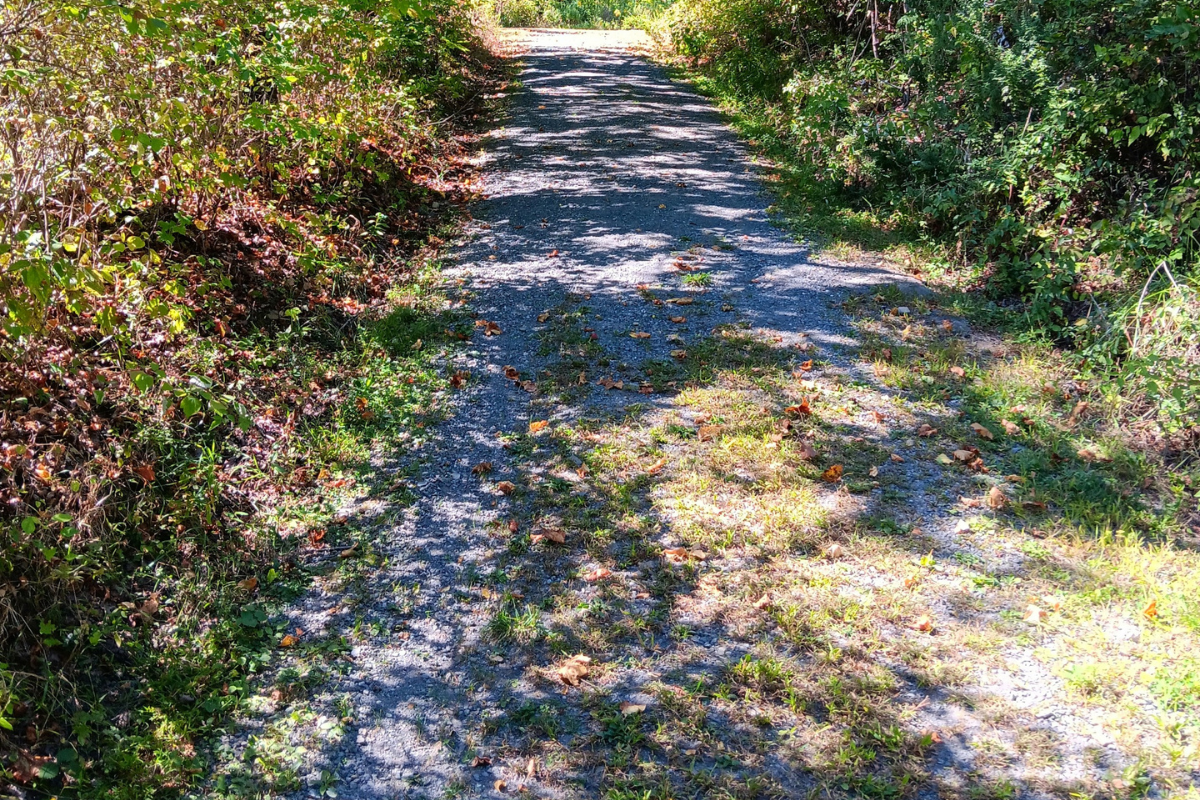
A worn down path with sunken gravel
The good news is that you usually don’t need to replace everything. The fix is about rebuilding the foundation.
Here’s how to correct it properly.
If the gravel has already sunk significantly or become uneven:
You don’t always need to start from scratch, but you do need a stable surface before rebuilding.
This is the most important step.
A strong base usually includes a compactable material like crushed rock or road base. These types of materials contain angled rock that locks together while allowing for drainage, as well as rock dust, or “fines”, that help hold the stones in place.
The key here is compaction. The base should be installed in layers and compacted thoroughly so it locks together.
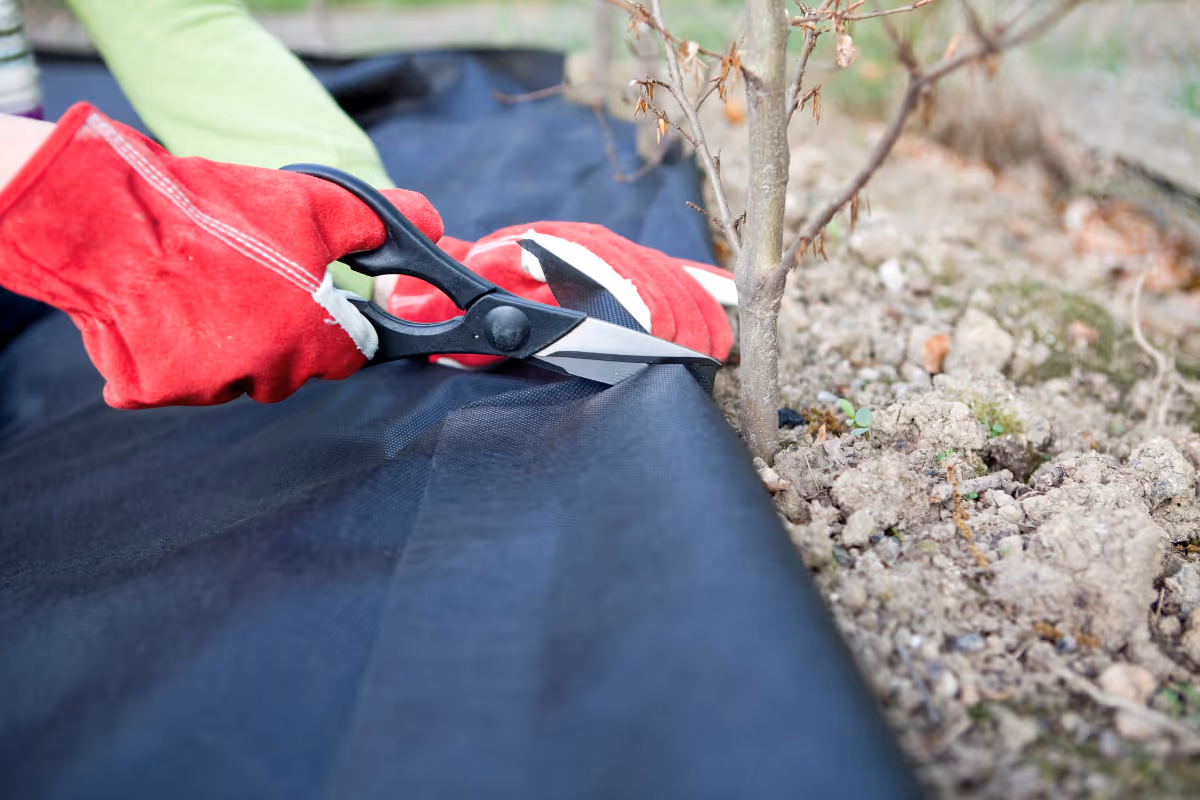
In many cases, a landscape fabric or geotextile layer is used between soil and gravel base.
This step is especially useful in areas with soft or wet soil.
Not all gravel behaves the same.
Smaller, rounded gravel tends to shift more, while angular gravel locks together better and creates a more stable surface.
Too little gravel exposes the base. Too much without a solid foundation can still shift over time.
Once gravel is installed:
Gravel is low-maintenance, but not no-maintenance. Small adjustments keep it stable and usable.
A few simple missteps cause most gravel problems:
Fixing even one of these can dramatically improve performance.
Gravel sinking is rarely a gravel problem. It’s a foundation problem.
When the base is properly prepared, compacted, and layered, gravel becomes one of the most durable and low-maintenance landscape materials available.
If your gravel areas are already sinking, the solution isn’t necessarily to replace everything. It’s to rebuild what’s underneath so the surface has something solid to rely on.
And if you’re planning a new project, getting the base right from the start will save you a lot of time and frustration later.
If you need help choosing the right base materials or figuring out how much you need, Schlegel can help you get it done right the first time. Contact us for advice on best gravel types for your project, or to get a quote.
Rock products offer a low-maintenance, long-lasting solution for a wide range of landscaping needs. Whether you're building a path, designing a dry creek bed, or simply refreshing your garden beds, rock can offer durability and visual impact with less maintenance than organic mulch. But not all rocks are created equal. Here's a breakdown of the three most commonly used types (river rock, crushed rock, and decorative rock) along with tips on where each one shines.
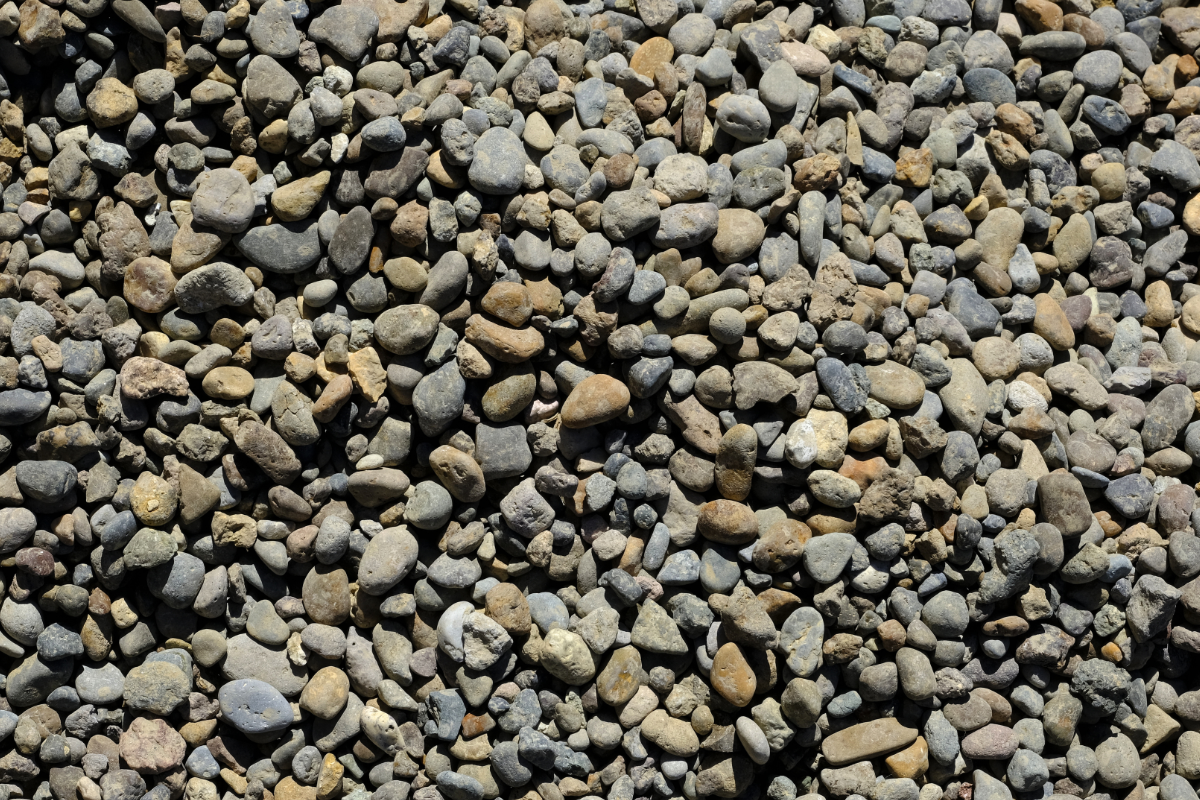
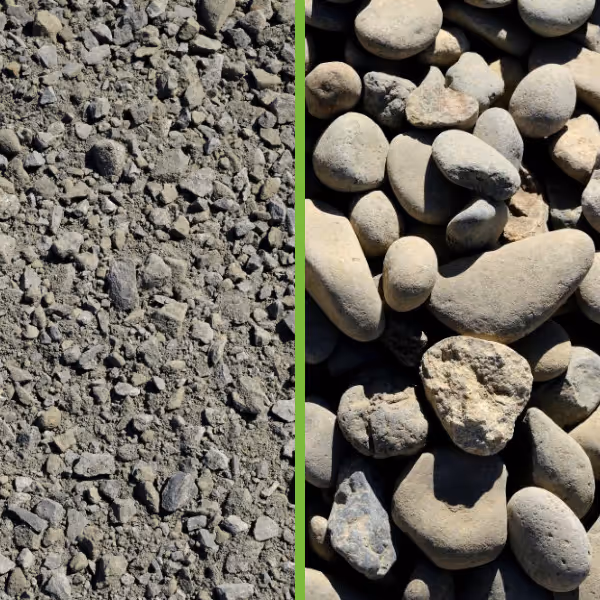
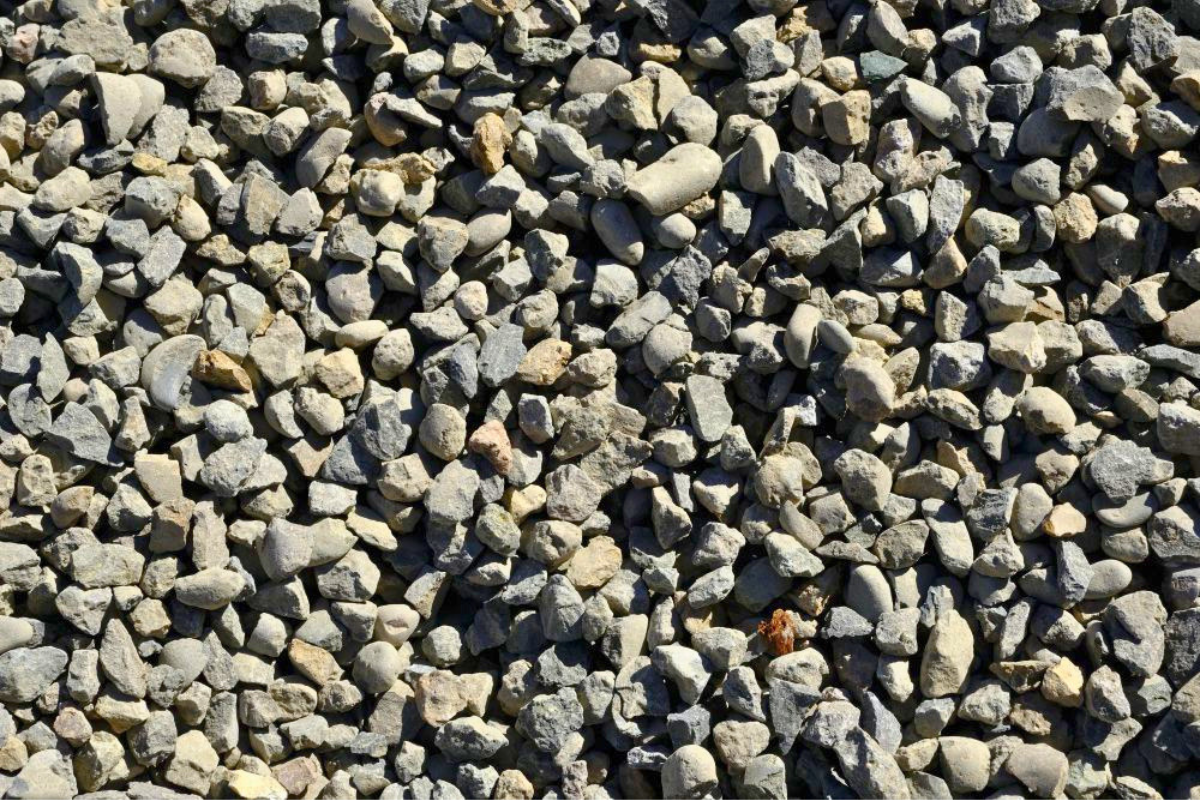
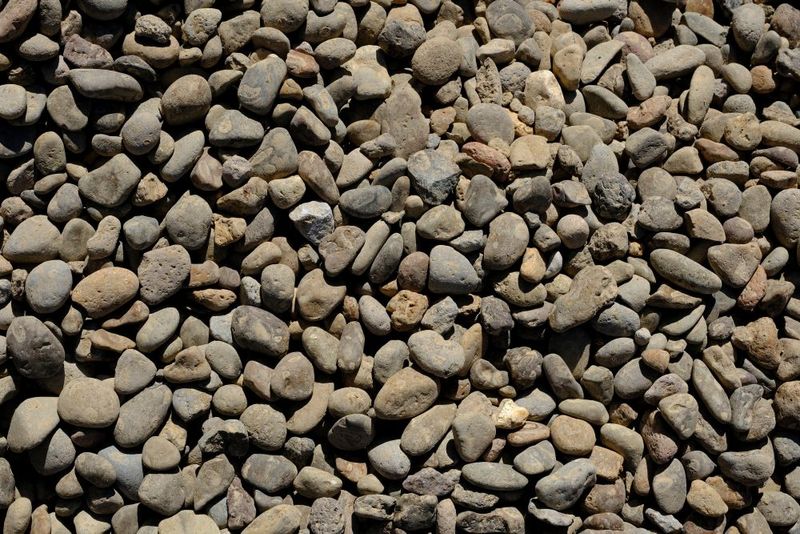
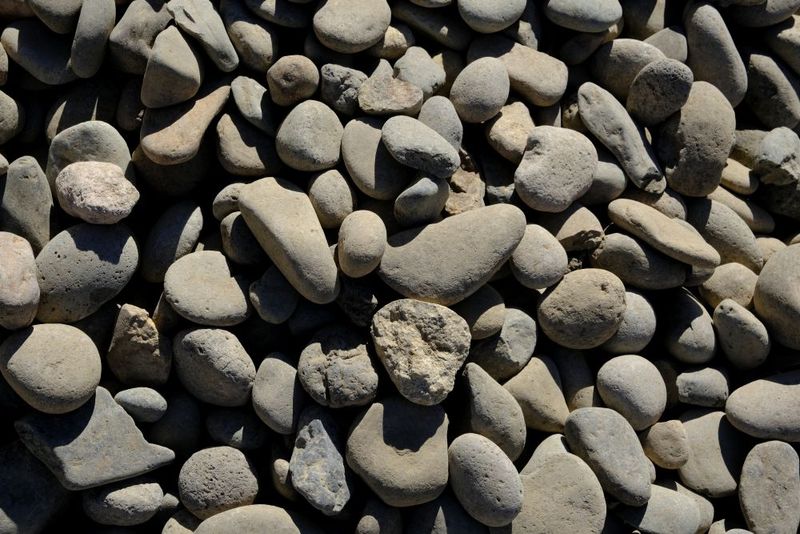
River rock is composed of smooth, rounded stones that have been naturally shaped by moving water over time. It typically comes in a variety of sizes and colors, ranging from soft grays and tans to mixed hues.
River rock gives a natural, polished look to any outdoor space and doesn't break down over time like bark mulch. It’s also excellent for improving drainage in areas that get heavy rain.
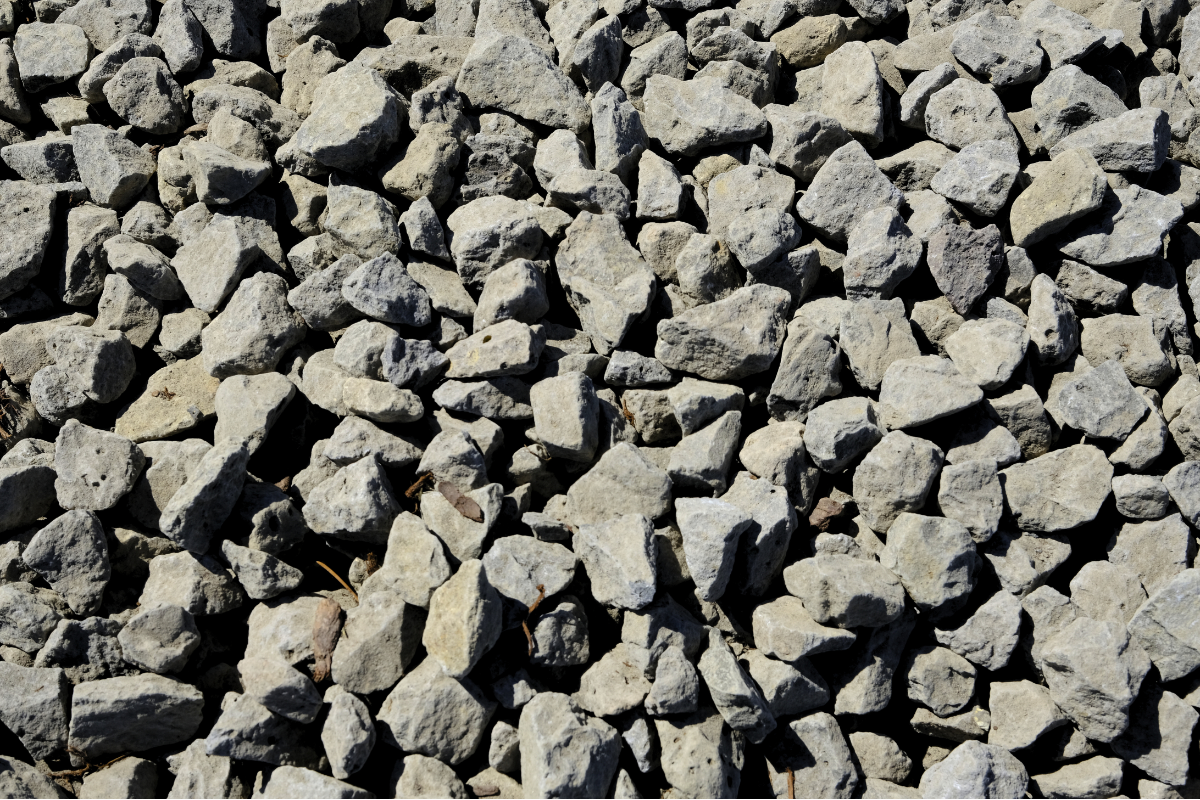
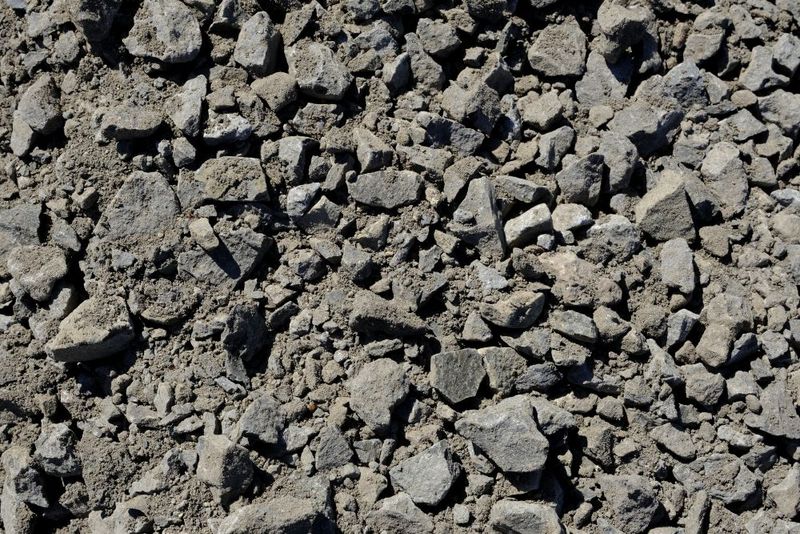
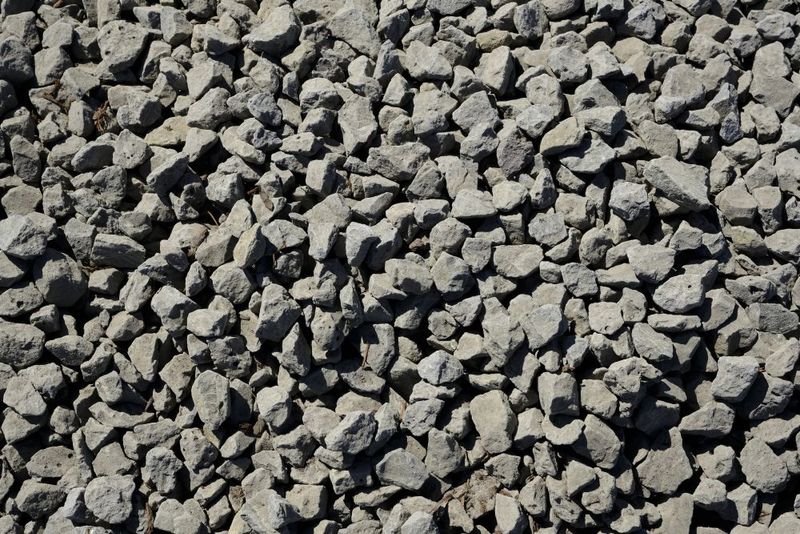
Crushed rock (also called crushed stone or gravel) is made by mechanically breaking down larger rocks into angular fragments. It’s available in different sizes, from fine gravel to larger chunks used in construction.
Because of its angular shape, crushed rock compacts well and locks into place, making it ideal for high-traffic surfaces and structural support. It’s also cost-effective and easy to maintain.
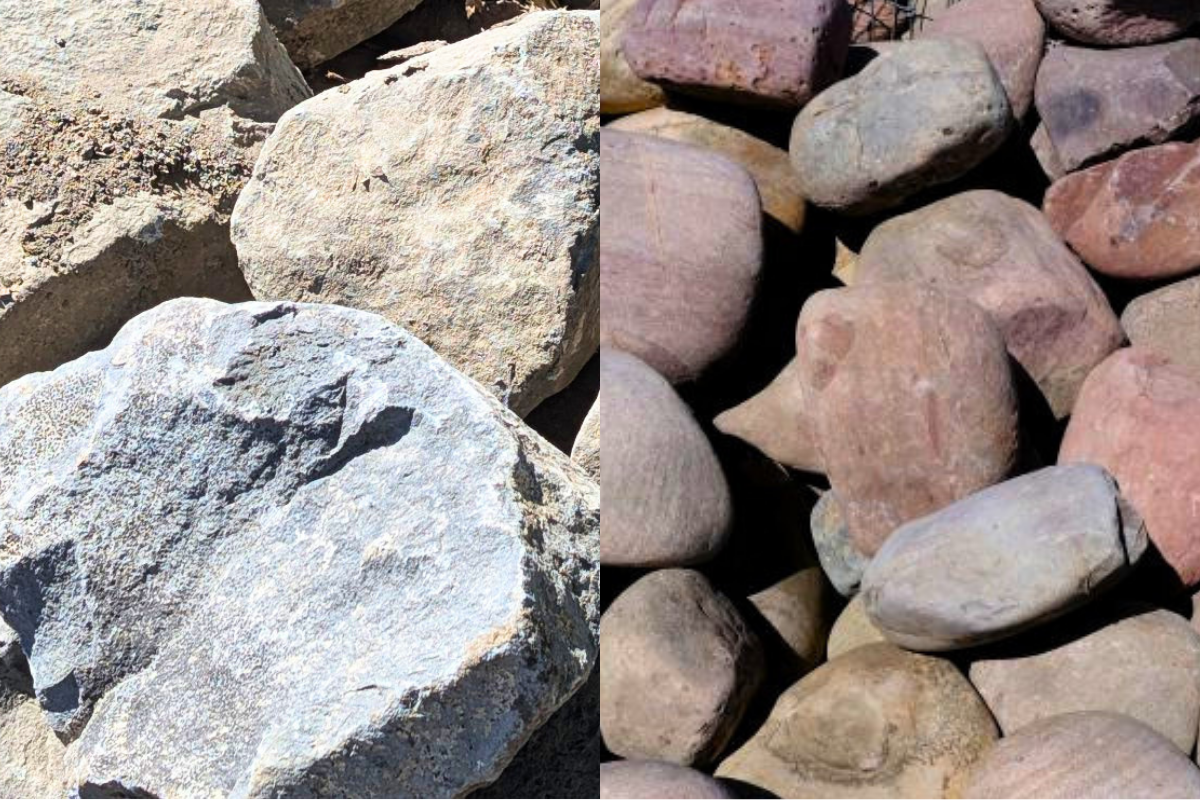
Decorative rock is a broad category that includes many styles and types of stone chosen primarily for their aesthetic appeal. This can include lava rock, slate chips, polished pebbles, or specialty-colored gravel.
Decorative rocks add color, texture, and personality to your landscape design. They can be used to complement hardscapes, highlight planting beds, or add a clean, contemporary finish to your yard.
Each type of rock brings something unique to your outdoor space. River rock offers a natural, flowing aesthetic; crushed rock provides structure and practicality; and decorative rock adds flair and design flexibility. Choosing the right one depends on your goals, whether it’s form, function, or a little of both.
Want help choosing the right rock for your next landscaping project? Contact us or visit our location to see your options in person.
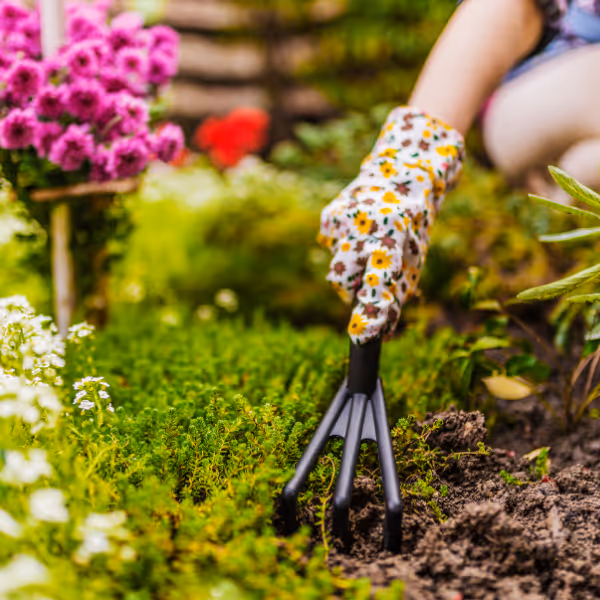
Earth Day often brings attention to large-scale environmental issues, but meaningful change can start much closer to home. Everyday decisions in your yard and garden influence water usage, soil health, waste reduction, and long-term plant success. Many of the most effective improvements are simple, affordable, and easy to maintain.
Here are a few practical ways homeowners can make environmentally responsible choices this spring while also creating a healthier landscape.
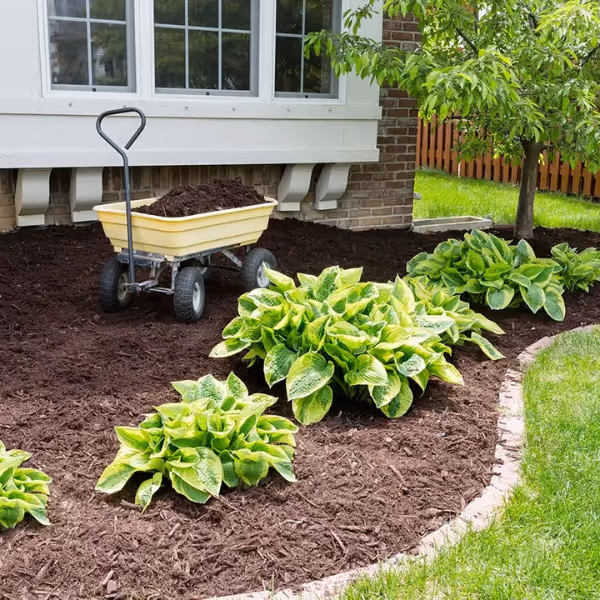
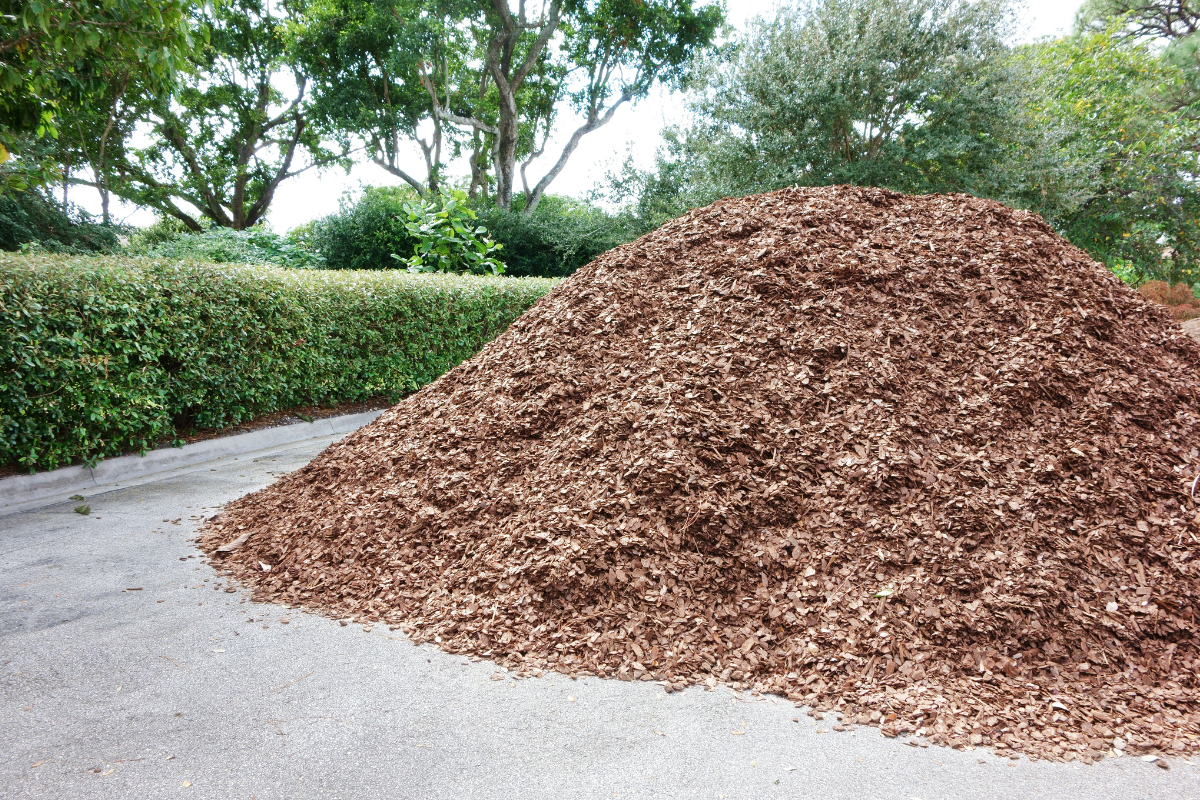
Mulch does more than improve the appearance of garden beds. A fresh layer of barkdust helps regulate soil temperature and significantly reduces evaporation. This means plants stay hydrated longer and require less frequent watering, especially as temperatures begin to rise.
Mulch also suppresses weeds, which compete with plants for water and nutrients. Fewer weeds means less manual removal and less need for chemical weed control products.

For best results:
This one step supports plant health while conserving water throughout the growing season.
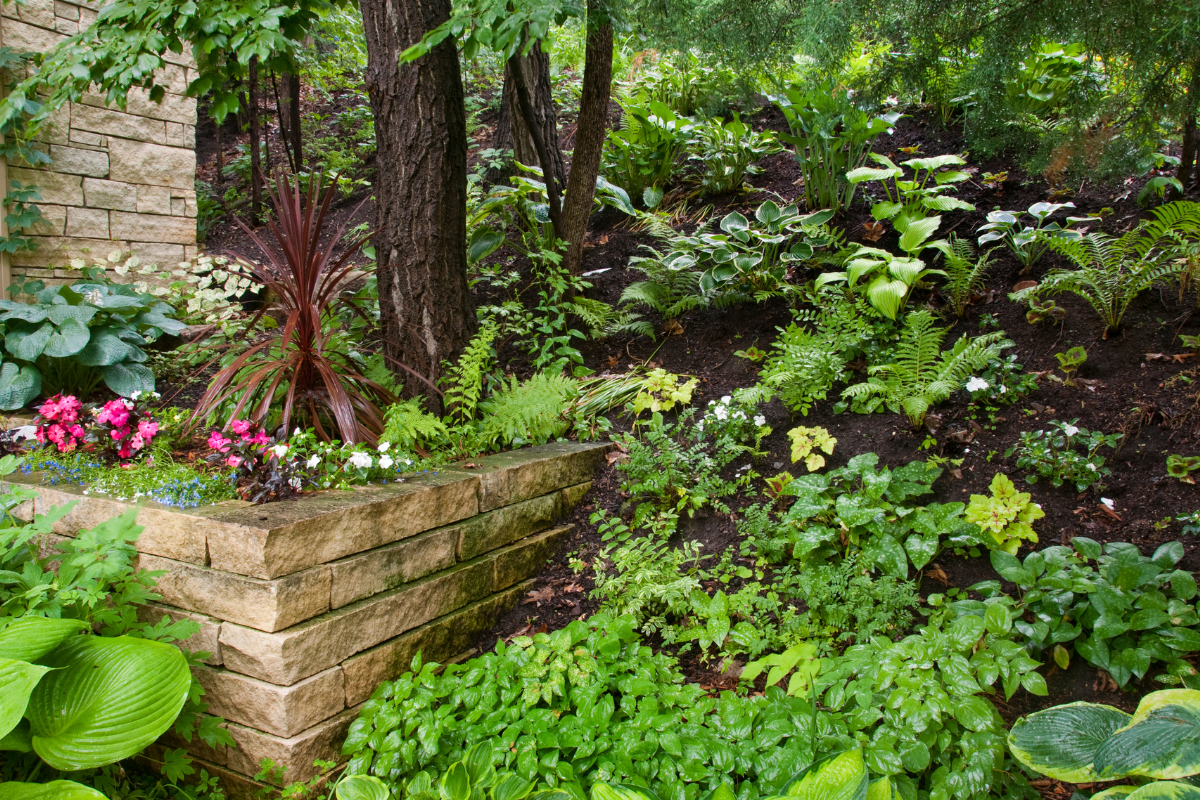
Healthy soil is one of the most important foundations of sustainable landscaping. Compost improves soil structure, increases moisture retention, and adds nutrients naturally. Over time, healthier soil supports stronger root systems and reduces the need for fertilizers.
Topdressing lawns with compost in spring is a simple way to improve turf health. Adding compost to garden beds before planting helps vegetables, flowers, and shrubs establish more easily.
Benefits of using compost:
Small additions each year can make a noticeable difference in plant performance.
Bagged landscape materials create a significant amount of plastic waste. Bulk delivery eliminates the need for dozens of individual bags and reduces packaging that would otherwise end up in landfills.
Bulk materials also allow homeowners to order the exact quantity needed, which helps prevent excess product from being discarded later. Delivery reduces the number of trips required to transport materials, saving fuel and time.
Choosing bulk materials is one of the easiest ways to reduce waste during landscaping projects. All of Schlegel's products, including barkdust, soils, compost, and rock, are sold in bulk, pakage free.
Gravel pathways and driveways are a more flexible and environmentally friendly alternative to solid paving. They allow water to drain naturally into the soil rather than running off into storm drains.
Maintaining gravel is also simple. Adding a fresh layer to low spots restores function without the need for full replacement. This reduces material waste and extends the life of the existing surface.
Regular maintenance tips:
These small adjustments keep surfaces functional while supporting better drainage.
Choosing plants suited to local conditions reduces water use and maintenance. Native and drought-tolerant plants typically require less irrigation once established and are better adapted to seasonal weather patterns.
Grouping plants with similar water needs also helps avoid overwatering. Mulching around new plantings improves establishment and reduces stress during dry periods.
When planning new planting areas:
Thoughtful planning creates a landscape that thrives with fewer inputs.
Environmentally friendly landscaping does not require major changes. Applying mulch, improving soil, choosing bulk materials, and maintaining gravel surfaces are all simple steps that support healthier plants and reduce resource use.
These small choices improve the long-term sustainability of your yard while also making maintenance easier. Over time, the benefits become more noticeable through stronger growth, reduced watering, and fewer weeds.
Earth Day is a good reminder that meaningful impact often begins with practical decisions at home.
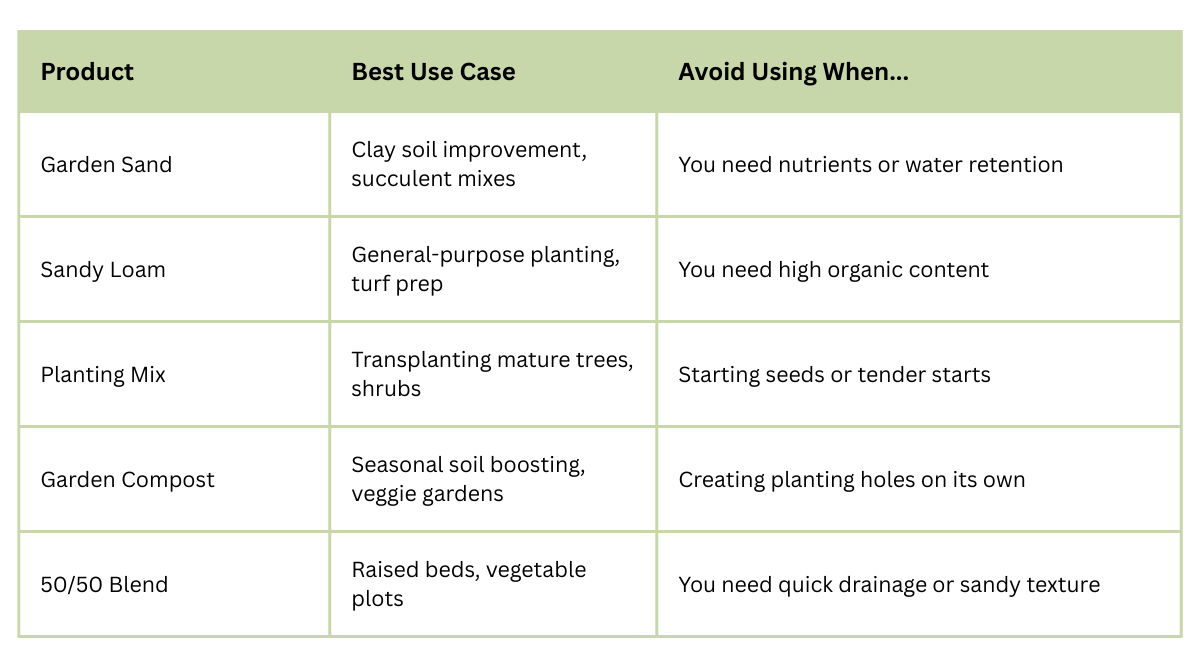
Healthy soil is the foundation of every successful landscape project. Whether you're planting perennials, building raised beds, or prepping a new lawn, starting with the right soil amendment makes all the difference. At Schlegel Barkdust, we offer a range of high-quality soil products, each designed with specific uses in mind. Here’s a closer look at five popular options and how to choose the right one for your project.
Best for: Improving drainage in clay-heavy soils, mixing into cactus or succulent soil, leveling low spots in lawns.
Garden sand is a coarse-textured material that helps break up dense, compacted soils. If your yard has heavy clay that stays soggy after rain, working garden sand into the topsoil can boost drainage and aeration. It's also a key component in custom soil mixes for plants that prefer drier conditions, like lavender or succulents. For lawn care, it can be used as a topdressing or to fill shallow depressions.
Best for: General garden soil improvement, new garden beds, turf installation.
Sandy loam is a well-balanced soil mix with a blend of sand, silt, and a small amount of clay. It’s a versatile choice for most gardening applications because it drains well, yet retains enough moisture for healthy plant growth. Sandy loam is ideal for filling new garden beds, leveling out areas before laying sod, or improving existing soil structure in vegetable and flower gardens.
Best for: Installing mature shrubs, trees, or perennials.
This rich, ready-to-use mix is designed specifically for planting established plants - not seedlings or starts. Our planting mix has the structure and nutrient content to support larger root systems, giving mature plants the best chance to settle in and thrive. Use it to backfill planting holes or to amend poor soil when planting trees and shrubs around your home or business.
Best for: Enriching tired soil, feeding vegetable gardens, improving moisture retention.
Compost is the go-to amendment for gardeners who want to boost soil health naturally. Packed with organic matter and beneficial microbes, compost improves nutrient content, water retention, and overall soil structure. Mix it into garden beds each season to feed heavy feeders like tomatoes and squash, or spread a thin layer over lawns and flower beds to revitalize depleted soils.
Best for: Starting new raised beds, preparing vegetable gardens, improving compacted or nutrient-poor soil.
This nutrient-rich blend combines screened topsoil with well-aged composted manure. The result is a fertile, moisture-retentive amendment that’s especially effective for growing fruits and vegetables. It’s an excellent choice when you’re building new raised beds, prepping large garden plots, or rejuvenating areas where the soil has been stripped or neglected.
No two gardens are exactly the same, which is why choosing the right soil amendment matters. Whether you're breaking ground for a brand-new flower bed or refreshing your vegetable garden for the season, Schlegel Barkdust has the products and advice you need to get the job done right.
Need help picking the right mix for your next project? Give us a call or stop by! We’re happy to help you build better soil from the ground up.
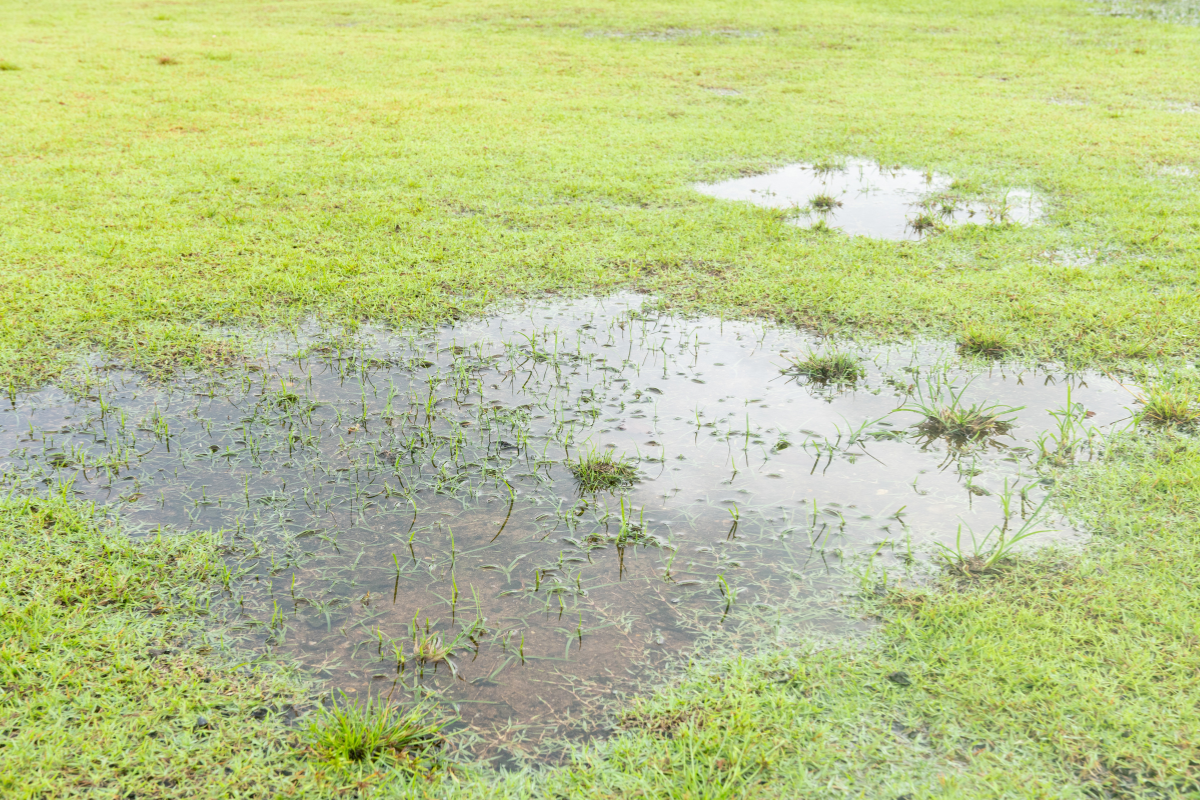
In Oregon, rain doesn’t arrive in dramatic bursts. It settles in. Weeks of steady moisture saturate lawns, soften garden beds, and slowly test the weak points in a landscape.
After a storm, take a walk around your yard and ask a simple question:
Where is the water going?
If the answer is “nowhere” or “toward the house,” it’s time to think about improving your drainage.
Drainage isn’t just about avoiding muddy shoes. When water lingers in the wrong places, it can:
In this region, extended periods of high moisture are normal. What matters is how well your landscape manages it. A yard that drains properly dries out evenly, feels firm underfoot, and doesn’t collect standing water long after a storm.
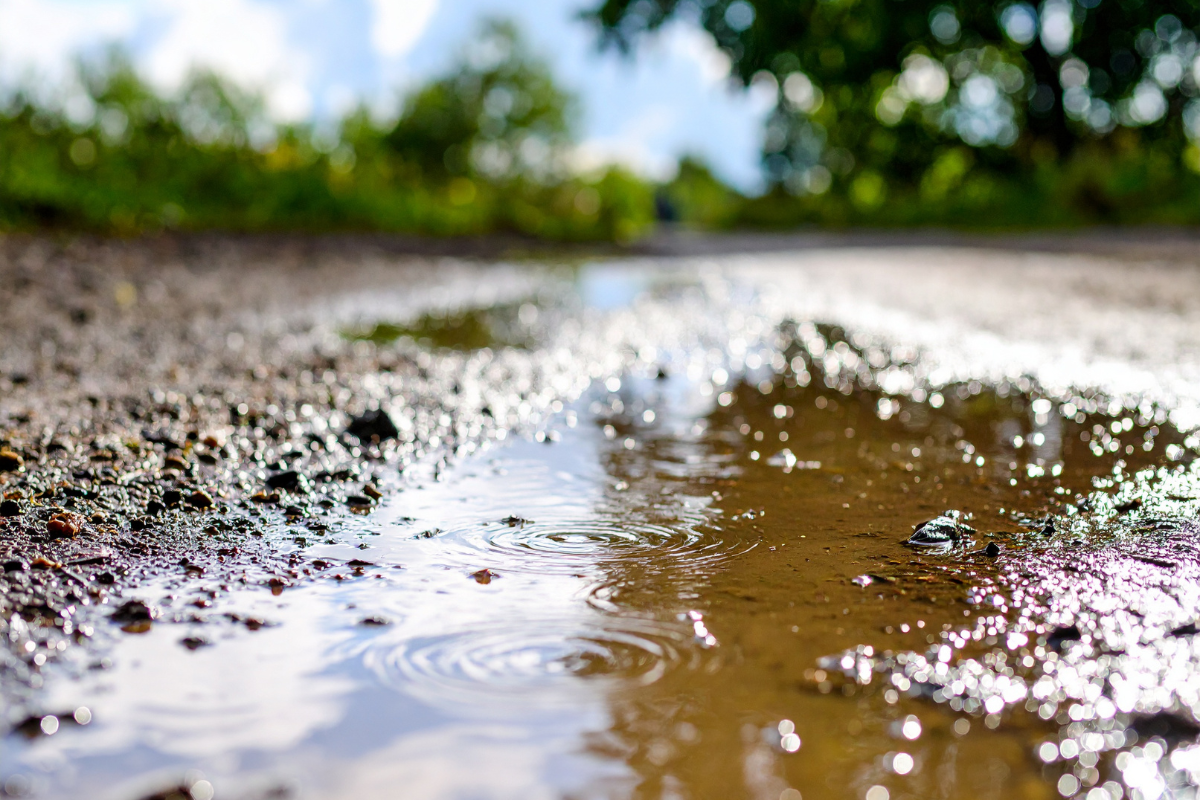
You don’t need special tools to assess drainage—just observation. Start by walking your property within 24–48 hours after a steady rain. Look for:
Close up of a rain puddle in a gravel driveway
Spring gives you the clearest picture of how water behaves on your property. Take advantage of it before everything dries out.
Drainage rock is your best friend in your quest for a dry lawn. It’s a clean, angular crushed stone designed to create space between pieces so water can flow freely. Unlike rounded decorative stone, angular rock locks together while still allowing consistent water movement.
Those open gaps are what make it effective. Instead of trapping moisture, it provides a structured path for water to move through soil and away from problem areas. This is what makes drainage rock the go-to material in many drainage solutions.
Not every drainage problem requires the same fix. The right solution depends on where water is collecting and how it’s moving.
Regrading involves adjusting the slope of your yard to encourage water to flow away from structures. A swale is a shallow, gently sloped channel that directs runoff across a property. This solution is ideal when water consistently travels toward your home or pools at the base of a slope. It’s often the simplest and most cost-effective first step.
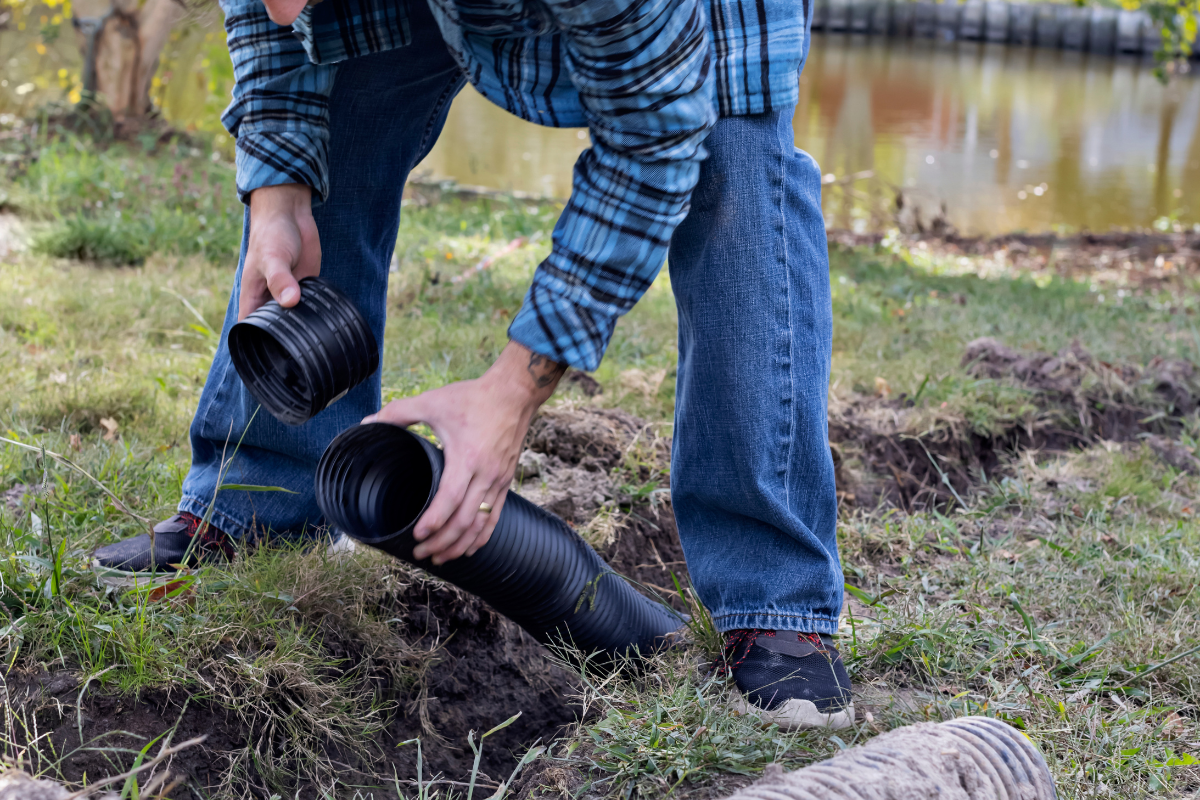
A French drain is a subsurface system consisting of a perforated pipe surrounded by drainage rock and wrapped in landscape fabric. It collects water underground and redirects it to a safer discharge point. This solution works well for recurring pooling in low areas or along foundations where surface grading alone isn’t enough.
If water collects near your home, improving the material against the foundation can make a significant difference. Replacing heavy, moisture-holding soil with drainage rock allows water to move downward and away more efficiently. This approach is ideal during construction, major landscape renovations, or when persistent foundation moisture is an issue.
Crushed gravel can stabilize muddy surfaces while allowing water to pass through rather than collect. If your driveway or walkway develops ruts each spring, refreshing and properly compacting the base may solve the issue. This is best for surface-level drainage and traffic-heavy areas.
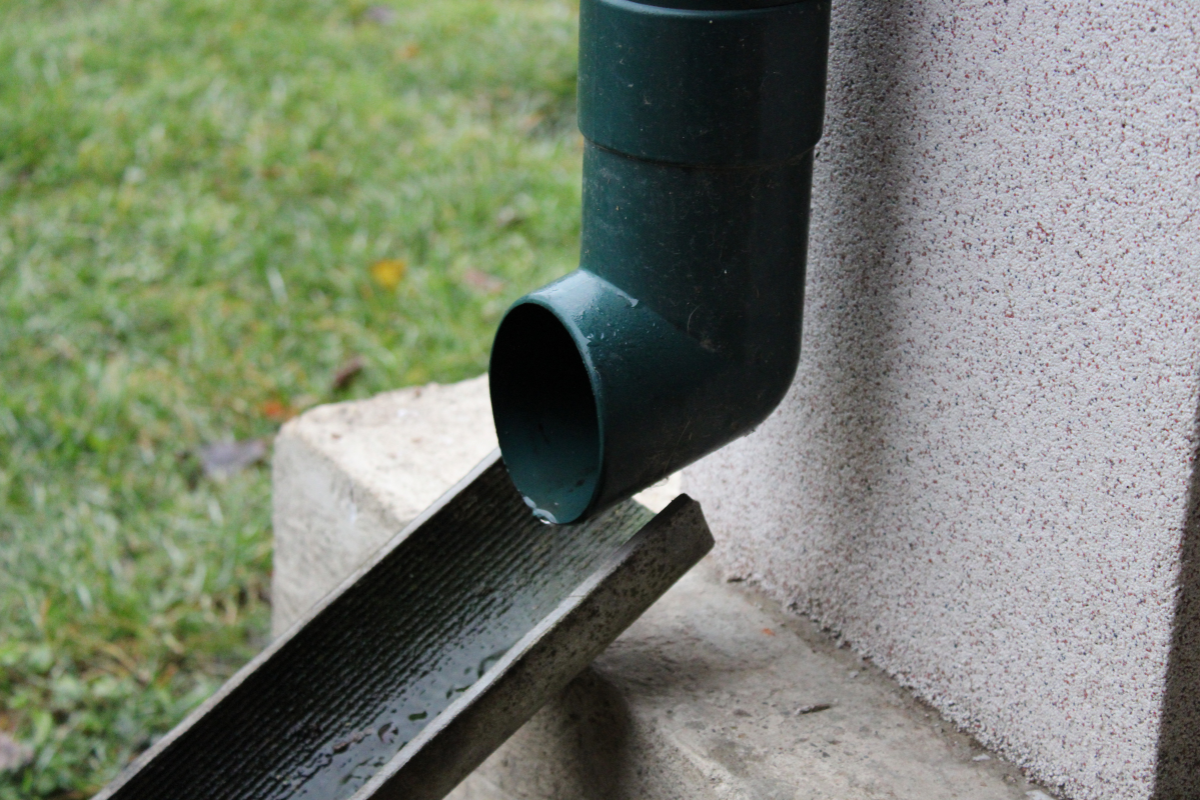
Sometimes the problem isn’t the yard—it’s the roof runoff. Extending downspouts to discharge water farther away from the home can dramatically reduce pooling near the foundation. This is a simple solution that works well when concentrated roof runoff is the primary cause.
Drainage is easiest to fix when the soil is dry, but the need often becomes obvious during the rainy months.
If you notice water lingering more than a day after rainfall, erosion along slopes, or repeated muddy spots, it’s worth evaluating before installing new hardscape or refreshing barkdust.
It’s also smart to address drainage before upgrading patios, driveways, or garden beds. Water management should come first. A beautiful surface won’t last long if the base beneath it stays saturated.
Whether you're installing a French drain, refreshing a gravel driveway, or addressing a muddy problem area, choosing the right rock makes all the difference.
If you’re planning a project this spring, make drainage part of the conversation before the heavy rains return. Contact us today to get help in choosing the right materials for your drainage project.
Gravel paths are practical, attractive, and low-maintenance—but not all gravel is created equal. Crushed gravel, with its angular edges and compacting qualities, stands out as one of the best materials for building long-lasting walkways that can handle foot traffic, weather, and time. Whether you're laying a garden path or edging a patio, here's what you need to know to get it right.
Crushed gravel is made by mechanically breaking down larger rocks into smaller, jagged pieces. Unlike rounded river rock, these sharp edges help the gravel lock together when compacted, creating a firm and stable surface. It comes in various sizes, but 1/4” to 3/4” crushed gravel is typically ideal for pathways.
The angular shape of crushed gravel allows it to compact tightly, creating a surface that’s less likely to shift, rut, or wash out over time.
Gravel allows water to drain through, preventing puddles and reducing runoff. This makes it especially suitable for sloped areas or climates with heavy rainfall.
Crushed gravel is generally more affordable than pavers or poured concrete, both in material cost and installation. It’s also easier to repair or refresh as needed.
Its earthy tones and texture blend seamlessly into most landscapes, from rustic gardens to more modern designs.

Mark the desired path with stakes and string, then remove any grass or existing materials along the route. A width of 3 feet is typical for garden paths.
Dig to a depth of about 4–6 inches, depending on how much base material you plan to use. Make sure the trench is level and well-graded to encourage drainage.
Install landscape edging along both sides of the path to hold the gravel in place and prevent spreading over time. You can use metal, plastic, wood, or stone.
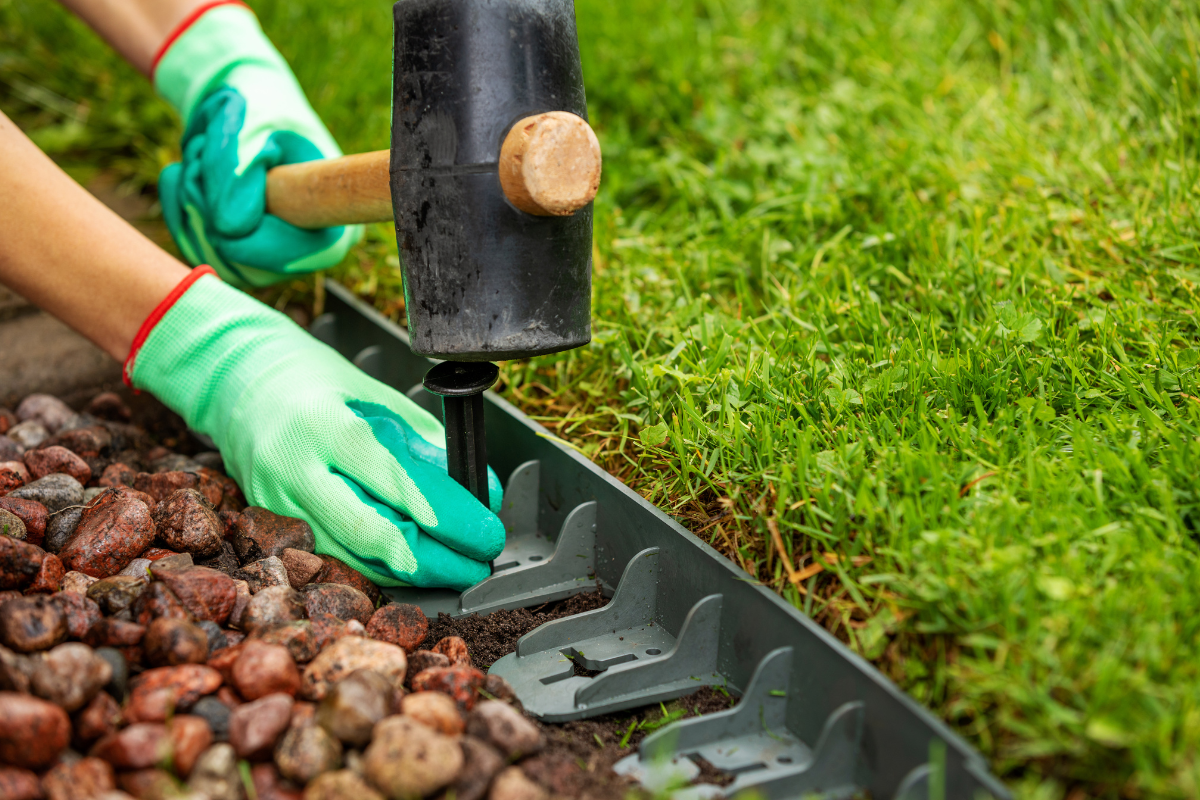
Fill the excavated area with 2–3 inches of crushed rock or gravel base and compact it thoroughly using a tamper or plate compactor.
Add 2–3 inches of finer crushed gravel (like 1/4” or 3/8” minus), and compact it again. Rake the surface smooth and make sure the path slopes slightly to one side to shed water.

Crushed gravel pathways are a durable, budget-friendly solution that fits beautifully into both traditional and modern landscapes. With proper preparation and a little ongoing care, your gravel path can last for many years—offering both form and function in your outdoor space.
Need help choosing the right gravel for your pathway project? Reach out to our team or stop by our yard to see your options in person!
When it comes to landscape rock, not all materials behave the same. One of the biggest distinctions to understand is compaction—how tightly a material can be packed down. At Schlegel Barkdust & Landscape Supplies, we offer a wide range of rock products, and choosing between high compaction and low compaction options can make or break your project.
Here’s what you need to know.
Compaction refers to how densely a material can be packed together, reducing air pockets and creating a firm, stable base. In landscaping, the degree of compaction matters because it affects drainage, load-bearing strength, erosion resistance, and long-term stability.
Use high compaction rock in areas that need a strong foundation or consistent surface. Common applications include:
These rocks are ideal for creating structural integrity, preventing shifting, and reducing settling over time.
 |
 |
1/4 Minus Rock
|
3/4 Minus Rock
|
 |
 |
Walking Gravel
|
Cement Rock
|
Choose low compaction rock when your primary goals are aesthetic appeal, drainage, or erosion control. These rocks are ideal for:
Low compaction rock is less stable underfoot, so it's not the best choice for heavy-traffic areas—but it excels at creating visual contrast and improving drainage.
 |
 |
Pea Gravel
|
River Rock
|
 |
 |
Montana River Rock
|
Drain Rock
|
To select the best rock for your project, consider:
Stop by Schlegel Barkdust or give us a call. Our team is happy to walk you through the pros and cons of each product and help you select the right material for your landscaping needs.
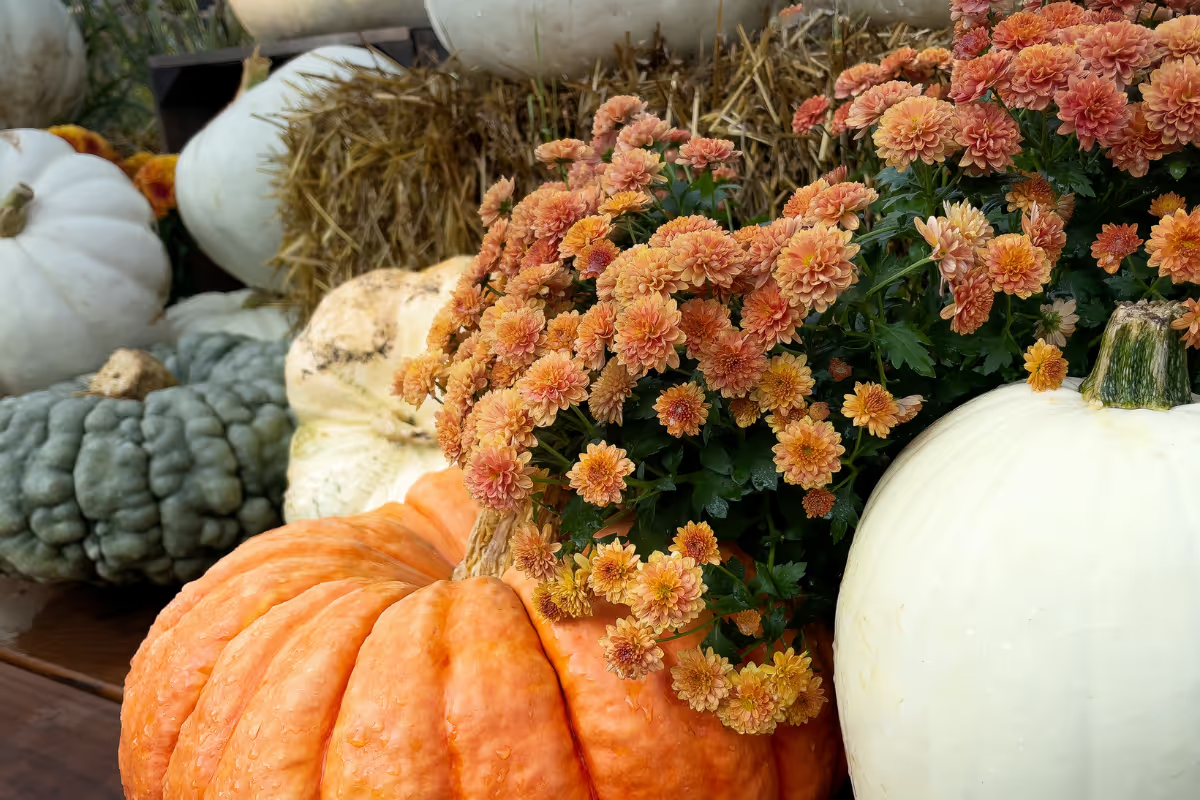
Crisp mornings, golden light, and leaves crunching underfoot—the fall season brings its own kind of beauty, and your outdoor planters can celebrate it. While summer blooms may be fading, autumn offers a fresh opportunity to create vibrant container gardens that last well into the cooler months.
Fall planters are more than just decoration; they set the tone for your home’s curb appeal and create a warm welcome for guests. Whether you prefer classic harvest hues or a more unexpected color palette, the mix of seasonal plants, rich textures, and creative accents can turn a simple pot into a standout feature.
With a few thoughtful choices and some inspiration, you can design planters that not only survive but thrive in the cooler weather. Let’s dig into the essentials that will help your fall containers look their best from September through the first frost.
Not all plants are happy once the summer heat fades, so it’s important to select varieties that can handle chillier nights. Ornamental kale and cabbage, pansies, violas, chrysanthemums, and heuchera are all cold-tolerant and perfect for fall. Pair these with grasses like fountain grass or carex for height and movement.
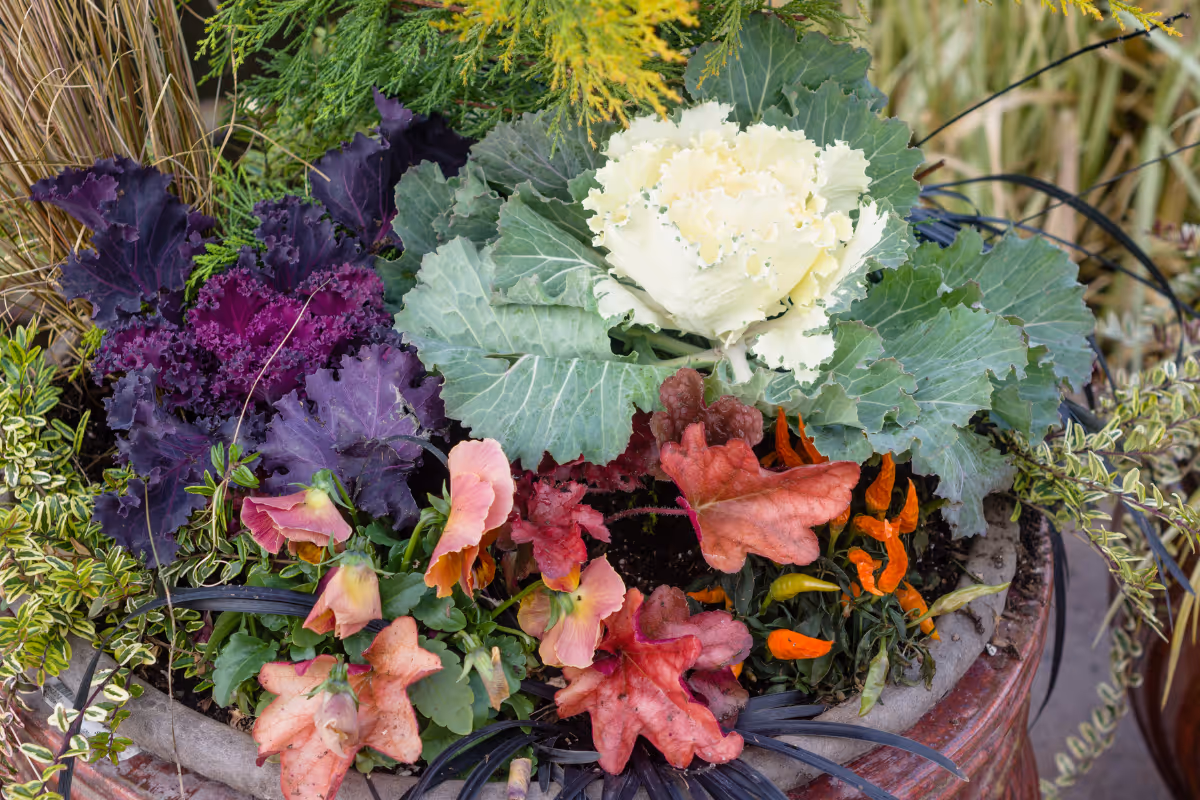
Autumn planters really shine when they offer visual richness. Combine velvety pansies with spiky grasses, or smooth kale leaves with the feathery fronds of asparagus fern. Stick to a warm palette of gold, burgundy, and orange for a traditional fall look, or create contrast with deep purples and silvery greens for something more modern.
Beyond plants, your fall container can be dressed up with decorative touches. Mini pumpkins, gourds, birch branches, and even dried seed heads from your summer garden can give your planter a festive, harvest-inspired feel. Just make sure accents are securely placed so they don’t blow away in autumn winds.
A well-balanced planter uses the “thriller, filler, spiller” approach—one tall, eye-catching plant or feature in the center, medium-height plants to fill the space, and trailing plants or vines that spill over the sides. In fall, ivy, creeping jenny, or vinca vine make excellent spillers, while tall grasses or small shrubs serve as stunning thrillers.
Cooler weather slows plant growth, so give roots the best environment possible. Use fresh potting mix and consider adding bark mulch to the top of the soil to help retain warmth and moisture. This simple step also gives the planter a polished, finished look.
Even though temperatures are dropping, fall planters still need regular care. Water when the top inch of soil feels dry, and deadhead spent blooms to encourage more flowers. As frost approaches, consider moving delicate containers closer to the house or under a covered porch for protection.
With the right plant choices, textures, and seasonal touches, your fall planters can be a standout feature well into the cooler months. Whether you’re aiming for bold and festive or subtle and elegant, a little creativity goes a long way.
Transform your outdoor space this season—contact Schlegel Barkdust today to learn more about how our premium bark products can add the perfect finishing touch to your fall container displays and landscaping projects.
When summer hits with its long, hot days, your yard can quickly start showing signs of stress. Grass fades to brown, plants wilt, and watering bills climb higher than you’d like. With recent summers becoming hotter and drier, keeping everything alive without wasting water becomes a balancing act.
The good news is that you don’t have to choose between a beautiful yard and responsible water use. A few smart changes in how and when you water—and in how you design your landscape—can make a big difference. Not only will your plants be healthier, but you’ll also help conserve one of our most precious resources.
Whether you’re caring for a lush lawn, a thriving garden, or a mix of both, these strategies will help you stretch every drop of water further during the hottest months of the year.
The timing of your watering schedule matters as much as the amount of water you use. Early morning is the best time to water because temperatures are cooler and winds are usually calmer, which means less water evaporates before it soaks into the soil. Avoid watering during midday heat or in the evening, when lingering moisture can invite fungal diseases.
A layer of barkdust or mulch around plants acts like insulation for your soil. It slows evaporation, keeps roots cool, and helps prevent weeds from competing for water. Apply 2–3 inches of barkdust around trees, shrubs, and garden beds, keeping it a few inches away from trunks or stems to avoid rot.
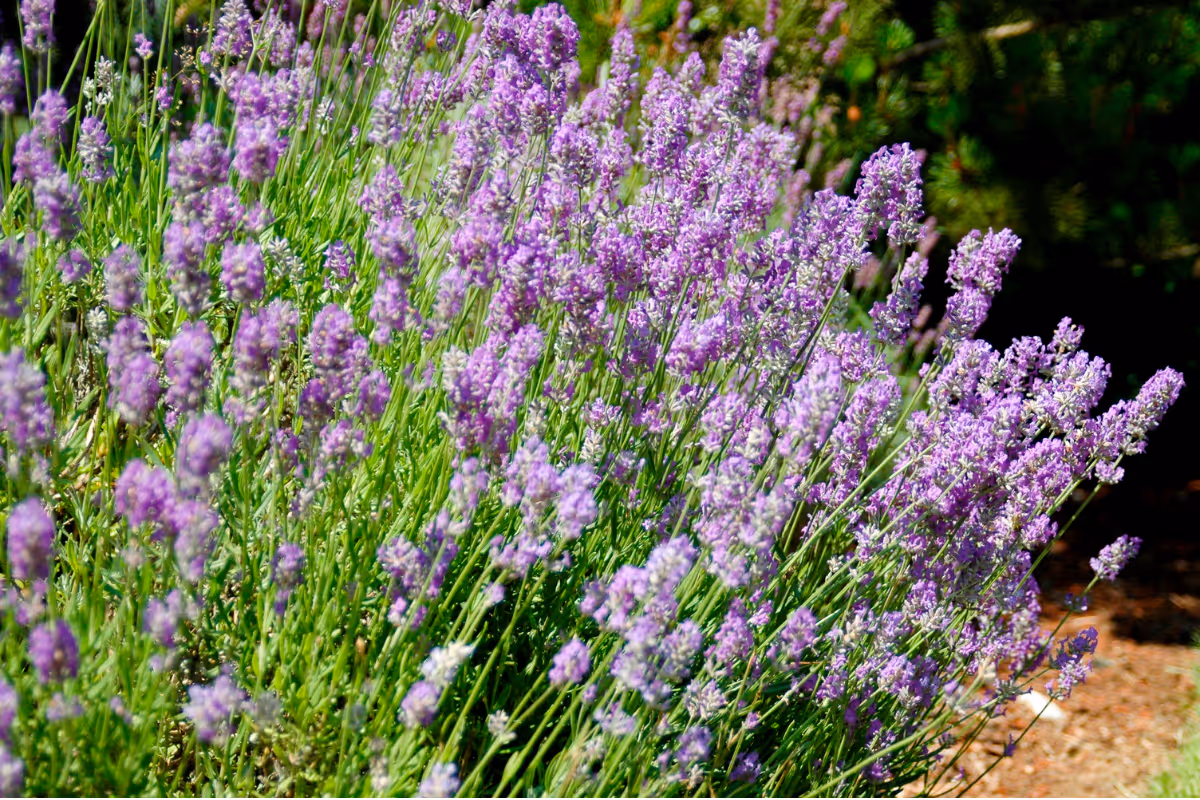
If you’re adding new plants to your yard, pick varieties that can handle dry conditions. Many native plants, ornamental grasses, and Mediterranean herbs like lavender or rosemary thrive with minimal water once established. Group plants with similar water needs together so you can irrigate them efficiently.
Shallow, frequent watering encourages weak, shallow root systems. Instead, give your lawn and garden a thorough soak a few times a week, allowing water to penetrate deeper into the soil. This helps plants develop strong roots that can better withstand heat and dry spells.
Leaks, broken sprinkler heads, or poorly aimed spray patterns waste a surprising amount of water. Check your irrigation system regularly and adjust it so water reaches plants—not sidewalks or driveways. Upgrading to drip irrigation for garden beds and shrubs can also dramatically improve efficiency.
A little planning and a few adjustments to your watering habits can keep your yard looking great without wasting water. By watering at the right time, using mulch, selecting drought-tolerant plants, and maintaining your irrigation system, you’ll be well on your way to a summer landscape that’s both beautiful and sustainable.
When you’re ready to boost your yard’s moisture retention and give it a fresh, polished look, contact Schlegel Barkdust for premium barkdust delivery. We’ll help you choose the right product so your yard stays healthy and water-wise all summer long.
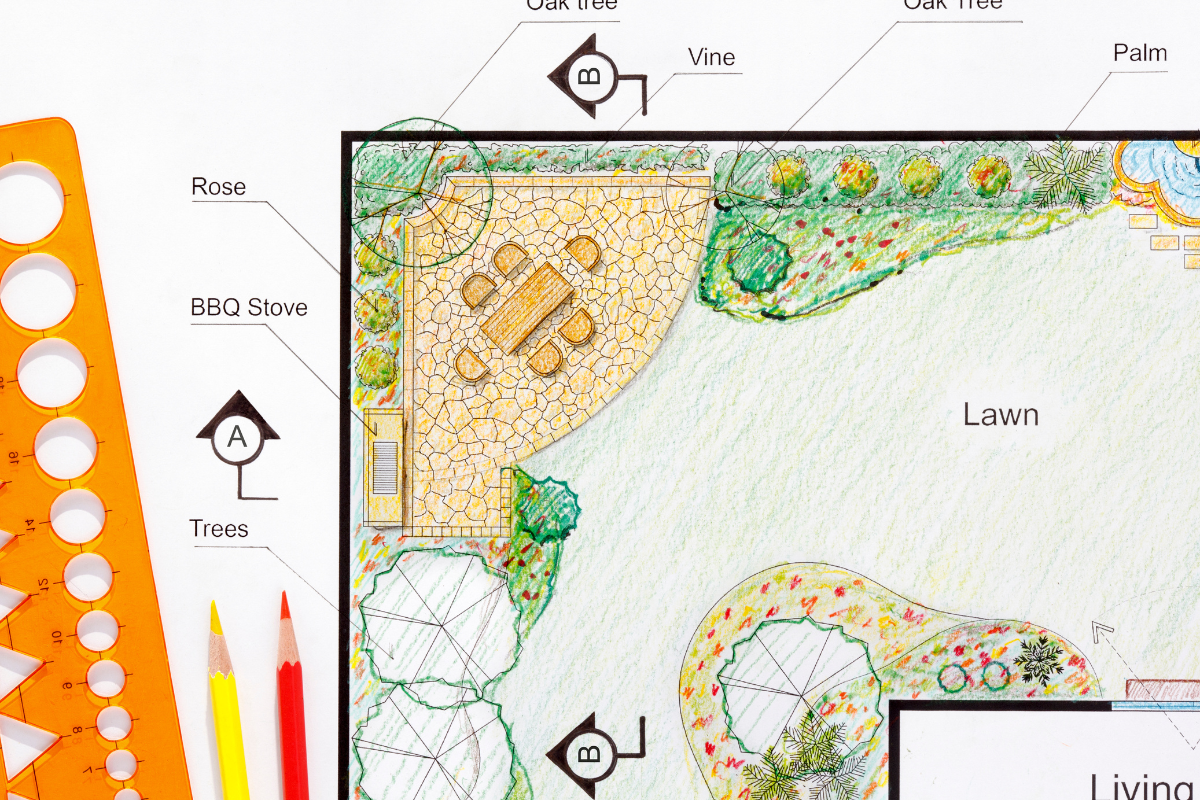
Home landscaping projects can be daunting and complex, especially if it’s your first time remodeling your front yard, backyard, garden, or other outdoor area. This blog can act as a guideline to plan your landscaping project. At Schlegel Barkdust, we have seen practically every landscaping project there is, so if you visit the store, we are more than happy to give you advice on specific materials and supplies you need, as well as answer any other questions you may have.
Understanding your landscape goals is the first and most crucial step in creating an outdoor space that truly reflects your vision and needs. Whether you’re aiming for a serene retreat, an entertainer’s paradise, or a low-maintenance garden, defining your goals helps guide the design process. It’s important to consider factors such as your lifestyle, aesthetic preferences, and how you intend to use the space. Are you looking to enhance privacy, incorporate sustainable elements, or perhaps create a family-friendly play area? By identifying these goals upfront, you can ensure that the final design not only looks beautiful but also serves your practical needs, ultimately making your landscape an extension of your home and a place that brings you joy and functionality.
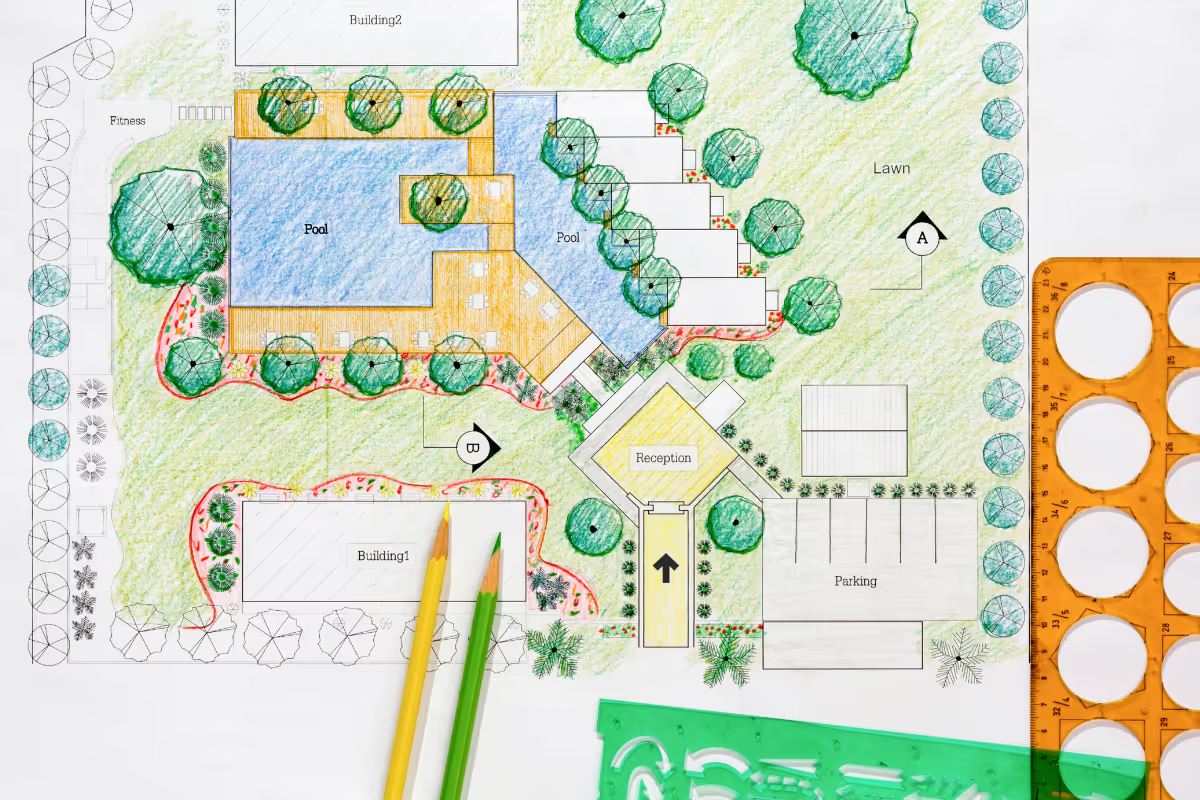
Once you have your goals set, it’s time to see if they are actually achievable. Sometimes, our dreams can get bigger than what reality allows, but don’t worry—that’s all part of the process. When looking at your goals for the landscaping project, it’s important to consider three things: What do you need, what do you have, and where is the project?
Before diving into a landscaping project, determine how much you can comfortably spend. Start by listing all the materials you’ll need, including product quantities, delivery costs, and any tools or equipment rentals. Add in a contingency—typically 10–15%—to cover unexpected expenses. Prioritize purchases that will have the biggest impact on your yard’s appearance and functionality, and consider phasing larger projects over time to spread out costs.

Some landscaping projects can be tackled over a weekend with basic tools, while others require specialized skills, equipment, or permits. Simple tasks—like spreading barkdust, laying gravel paths, or adding decorative rock borders—are often manageable for a DIYer. More complex jobs, such as installing retaining walls, grading for drainage, or working with heavy equipment, may be safer and more efficient with professional help. Evaluate the time, tools, and expertise you have available, then choose the option that ensures the best results without exceeding your budget.
For landscaping projects, it’s best to start them around summertime, so you won’t have to worry about supplies becoming ruined or damaged from rainfall that often happens in the greater Portland area the rest of the year. But besides the time of year, we’ve come up with three tips to adhere to when trying to stay on schedule with your landscaping project:
Transform your outdoor space with Schlegel Barkdust & Landscaping Supplies, your go-to source for all landscaping supplies! Whether you’re planning a garden overhaul, creating a beautiful pathway, or enhancing your yard’s aesthetics, we offer a wide variety of high-quality materials to suit every project. Our expert team is dedicated to helping you find the perfect solutions, from barkdust and mulch to soil and gravel. With prompt delivery and exceptional customer service, we make it easy to bring your landscaping visions to life. Contact Schlegel Barkdust today, and let’s get started on your dream landscape!
With the summer season comes the maintenance and change of your yard and landscaping. It’s no secret that we spend more time outside during the summer. Why not enjoy your outdoor oasis to its fullest potential? Check out these steps to prepare your yard and landscaping for the summer.
Cleaning is always a great start to any project. Ensure your yard has a fresh and pristine look by:
We are all envious of that neighbor with the perfectly green-trimmed lawn. You can have it, too! Lawn fertilizer has multiple benefits, including helping your grass stay healthy, promoting growth, supporting recovery from pests, animals, and humans, and supplying commonly lost nutrients. Make sure to mow your lawn before fertilizing, as it allows the fertilizer to reach the soil and be absorbed by the roots.
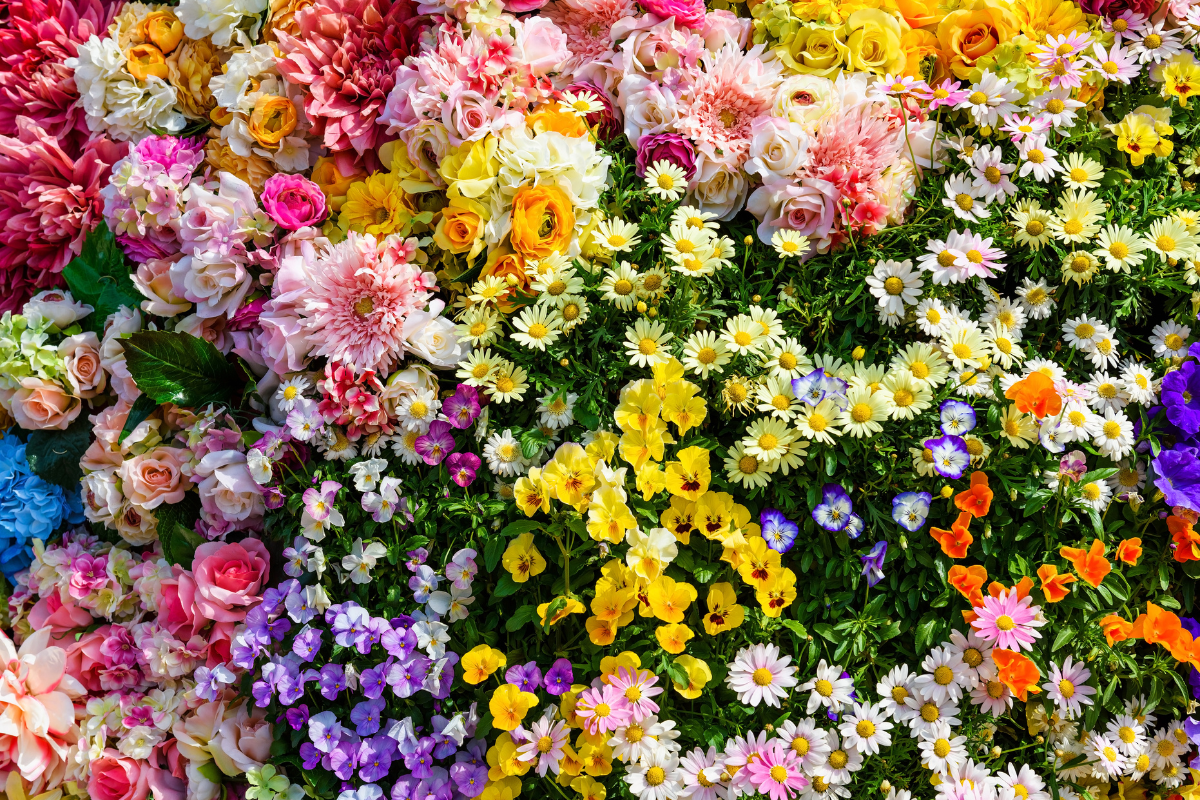
Adding color to your backyard is a great way to brighten the outdoor atmosphere and add to the summer aesthetic. Although late fall through spring is the ideal time for planting flowers, you can still plant in the summer, but you should keep these tips in mind:
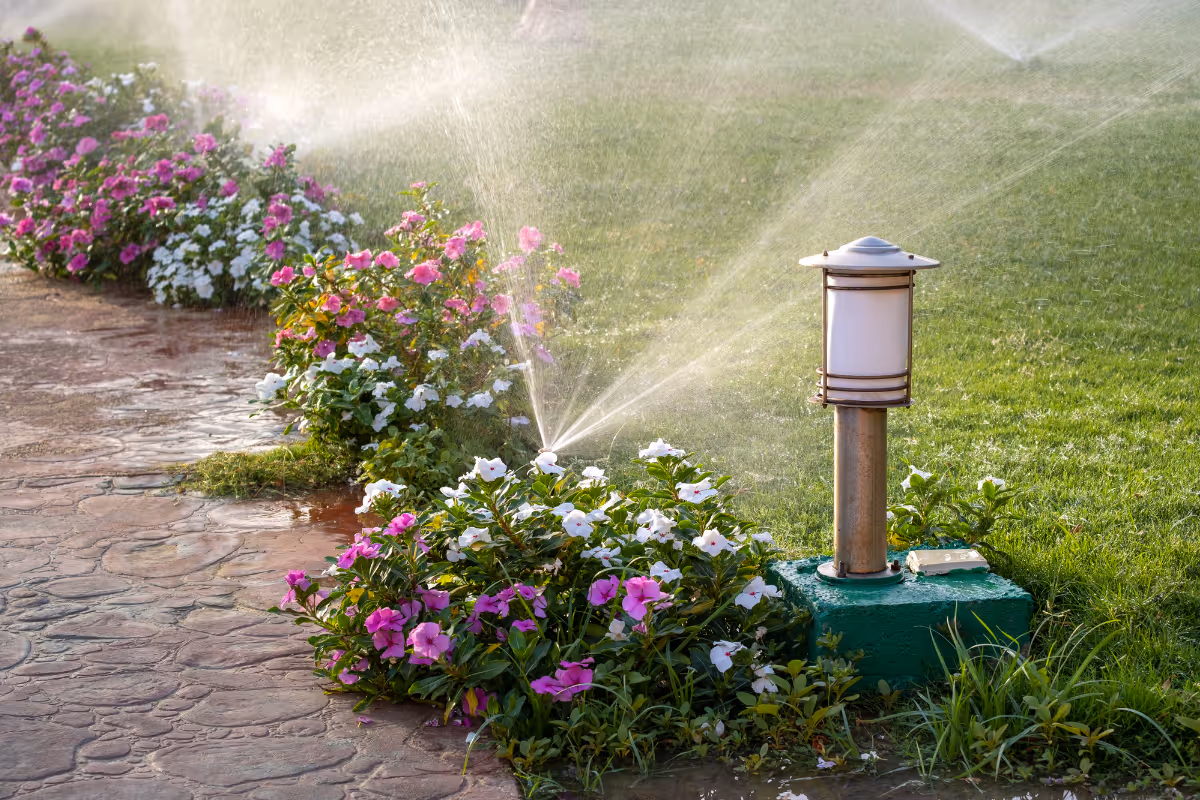
Keeping your lawn and plants watered during the summer is essential for the quality of your yard. Consider investing in an automatic sprinkler system to keep up with summer watering. Sprinklers can help with a greener lawn, are less time-consuming, and keep you and the kiddos cool while working or playing outside. To avoid wasting water, the best time to run your sprinkler system is in the early morning hours between 6 a.m. and 10 a.m.
Adding a variety of outdoor materials, such as bark, mulch, and rocks, can create a cohesive, clean-looking design that also benefits your plants! Mulch and rock landscaping can positively impact your plants as they provide an ideal environment that leads to healthy soil.
It’s the perfect time to start preparing your yard for summer. Look to Schlegel Barkdust & Landscape Supplies for all your outdoor needs. For over thirty years, Schlegel Barkdust has provided customers with quality barkdust, rock, sand, and gravel. Contact us to get started today!
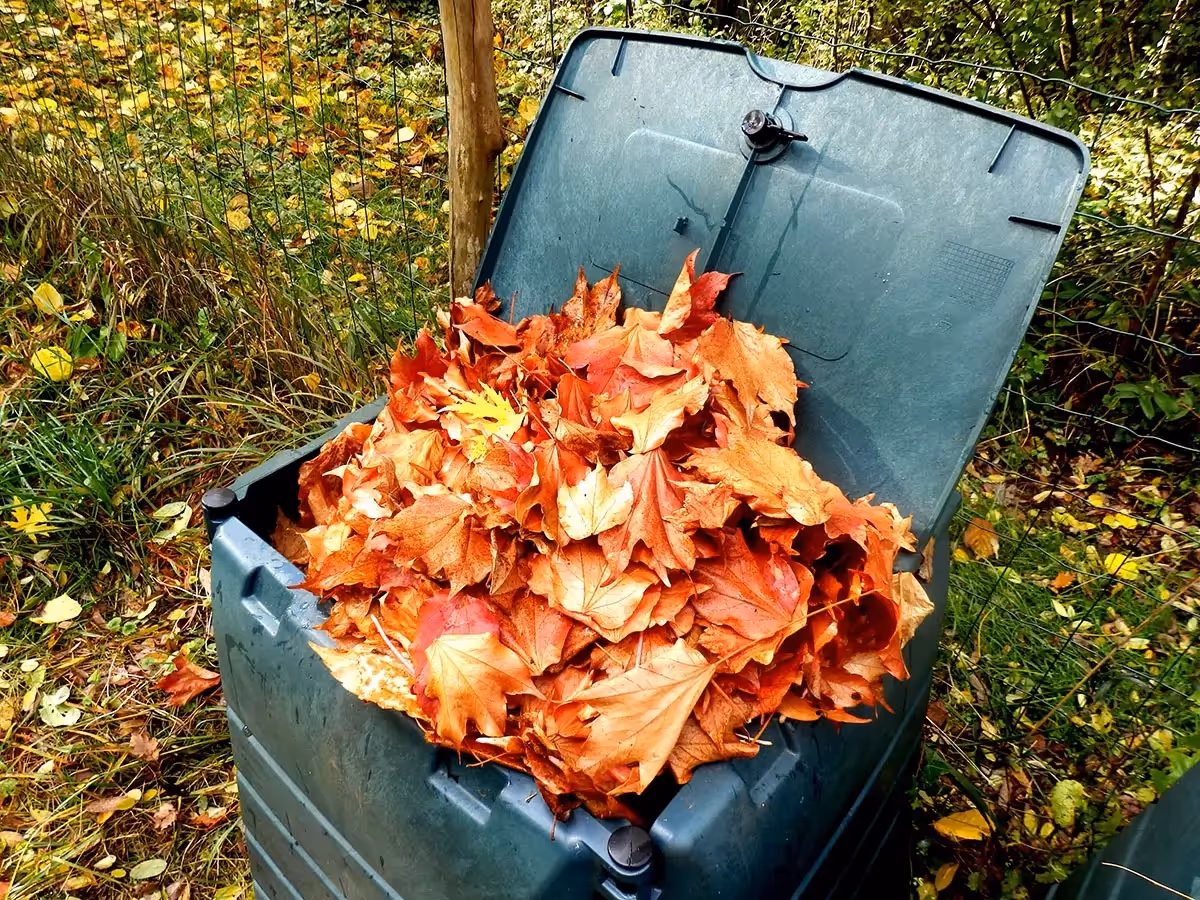
As the vibrant hues of autumn leaves fall from the trees, many homeowners view them as a seasonal chore, raking and bagging them to be hauled away. However, these leaves represent an untapped resource that can transform your garden into a nutrient-rich haven. Composting in autumn is not only eco-friendly but also a frugal and practical way to enrich your soil, reduce waste, and save money on fertilizers. Let’s explore the art of turning leaves into nutrient-rich gold and examine why you should do it.
Autumn is the perfect time to start a composting project. While the falling leaves are a significant contributor to the composting process, there are several compelling reasons to get started:
Abundant Organic Material: Autumn provides an abundance of organic material in the form of fallen leaves. This rich source of carbon material is essential for a successful composting pile.
Reduces Yard Waste: Instead of bagging up leaves and sending them to the landfill, composting allows you to reuse these materials effectively, reducing the strain on local waste management systems.
Saves Money: Composting reduces the need for commercial fertilizers. You can save money by creating your nutrient-rich compost for your garden, which promotes healthy plant growth and higher yields.
Environmental Benefits: Composting is an eco-friendly practice that reduces greenhouse gas emissions associated with landfill decomposition and decreases the need for chemical fertilizers.
Improves Soil Health: Compost enhances soil structure, moisture retention, and nutrient content, creating an ideal environment for plants to thrive.
1. Gather Your Materials – To start composting in the fall, gather the following materials:
2. Choose the Right Location – Select a well-draining location with good airflow for your compost pile or bin. This helps prevent waterlogged compost, which can become anaerobic and produce unpleasant odors.
3. Create Layers – Layer your compost pile with a mix of brown materials (carbon-rich, like leaves) and green materials (nitrogen-rich, like kitchen scraps and grass clippings). A good rule of thumb is to maintain a 3:1 ratio of brown to green materials.
4. Maintain Proper Moisture – Keep your compost pile as damp as a wrung-out sponge. Water it regularly, ensuring it remains moist but not waterlogged. Proper moisture is essential for decomposition.
5. Turn and Aerate – Use a pitchfork or shovel to turn the pile every few weeks. This aerates the compost, helping it decompose faster and reducing the risk of odors.
Patience is Key – Composting takes time. Be patient; it can take several months to a year for your compost to fully mature.

Creating a beautiful and vibrant landscape doesn’t have to break the bank. With some smart planning and the right materials, you can achieve a stunning outdoor space without spending a fortune. One of the most cost-effective tools in a budget-friendly landscaping arsenal is mulch. Let’s explore how mulch can save you money while enhancing the beauty and health of your garden.
Mulch is a versatile material made from various organic materials, such as wood chips, straw and leaves. Its benefits extend far beyond aesthetics; mulch acts as a protective barrier for the soil, conserving moisture, regulating temperature, and suppressing weeds. By using mulch in your garden, you can minimize water usage and reduce the need for expensive chemical herbicides, ultimately saving money in the long run.
One of the most significant ways mulch can save you money is by promoting water conservation. By acting as a barrier, mulch reduces soil evaporation and slows down moisture loss. This means you won’t have to water your plants as frequently, leading to lower water bills during dry spells or in areas with water restrictions. In fact, studies have shown that using mulch can cut water usage by up to 50%, translating into substantial savings over time.

Weeds can quickly overrun a garden, competing with your plants for water, nutrients, and sunlight. Many gardeners resort to herbicides to keep weeds at bay, but these chemicals can be costly and may harm beneficial insects and organisms. Mulch provides a natural and affordable solution to weed control. By smothering weed growth and blocking sunlight, mulch prevents weed seeds from germinating and reduces the need for chemical interventions, saving you money and promoting a healthier garden ecosystem.
Healthy soil is the backbone of any thriving garden, and mulch plays a crucial role in maintaining soil fertility. As organic mulches break down, they release valuable nutrients into the soil, acting as a slow-release fertilizer. This natural process eliminates the need for costly synthetic fertilizers and nourishes your plants organically, fostering stronger root systems and more robust growth.

Extreme temperatures can take a toll on your garden, leading to stress and damage to plants. Mulch acts as a natural insulator, protecting the soil and plant roots from temperature fluctuations. During scorching summers, mulch helps keep the soil cool, reducing water evaporation and protecting delicate roots. In the colder months, it acts as a protective blanket, preventing frost damage. This temperature regulation not only saves on water and irrigation costs but also helps you avoid the expense of replacing damaged plants.
Erosion can be a significant problem in gardens with sloped or uneven terrain. When heavy rains come, topsoil can wash away, taking vital nutrients with it. Mulch forms a protective layer over the soil, reducing erosion and preventing the loss of valuable topsoil. By retaining the soil in place, mulch preserves the integrity of your garden, reduces the need for soil amendments, and saves you money on costly soil restoration.
Landscaping on a budget doesn’t mean compromising on beauty or functionality. With the strategic use of mulch, you can create an enchanting garden while saving money on water bills, weed control, fertilizers, and soil restoration. Embrace the natural benefits of mulch, and your garden will thrive, leaving you with more money in your pocket and a landscape to be proud of. So, go ahead, unleash the power of mulch, and enjoy the frugal beauty of your outdoor oasis.
Mulching is one of the simplest and most effective ways to maintain a healthy garden or landscape. It helps conserve soil moisture, regulate temperature, suppress weeds, and enrich the soil as it breaks down. But despite its many benefits, mulching can cause more harm than good if not done properly.
Here are the most common mulching mistakes—and how to avoid them.
A thick layer of mulch might seem like the best way to suppress weeds and retain moisture, but piling it on too heavily can suffocate your plants. Excess mulch blocks air and water from reaching plant roots and can encourage root rot and fungal growth, especially in wetter climates. It can also attract pests like slugs, voles, or termites.
Solution: Stick to a 2–3 inch layer of mulch. This is the sweet spot for most garden beds—it’s deep enough to provide all the benefits without smothering your plants.
Not all mulch is suitable for every landscape. Some types, like fresh wood chips or dyed mulch, may be too acidic or contain chemicals that leach into the soil. Others may decompose too quickly or attract unwanted pests.
Solution: Choose mulch based on your specific garden needs. Organic mulches like barkdust, shredded leaves, compost, or aged wood chips work well for most landscapes. For more decorative uses—like pathways or around trees—consider using rock or gravel mulch, which doesn’t decompose and requires less maintenance.

Mulch piled up against the base of a plant can trap moisture and encourage rot, mold, and disease. This is especially dangerous for trees, where it can lead to “volcano mulching”—a cone of mulch built up around the trunk that causes bark decay and pest infestations.
Solution: Keep mulch at least 2–3 inches away from stems and trunks. For trees, create a shallow mulch ring that extends out to the drip line rather than up the trunk.
Over time, mulch naturally breaks down and becomes compacted. If you keep adding new mulch on top without removing or loosening the old layer, the buildup can cause drainage problems, suffocate roots, and create a dense mat that repels water.
Solution: Before adding a fresh layer each season, rake through the existing mulch to aerate it and remove any clumps or compacted areas. If the mulch is overly matted or slimy, remove it and start fresh.
A well-mulched landscape can make all the difference in plant health, water conservation, and curb appeal. But only if it’s done right. Whether you’re looking for high-quality barkdust, decorative mulch, or help choosing the right product for your landscape, Schlegel Barkdust has you covered.
We deliver throughout the Portland metro area—and offer expert advice to help you get the job done right.
Contact us today or visit our yard to see our full selection of mulch and landscape supplies. Let’s get your garden thriving!
As the days grow longer and the soil begins to thaw, it’s the perfect time to turn your attention to the garden. Spring prep doesn’t have to be overwhelming—by tackling a few simple tasks early on, you’ll set yourself up for a season of healthy plants, fewer weeds, and better harvests. Whether you’re growing vegetables, flowers, or both, here’s how to begin prepping your garden for spring.
Before you dig into planting or planning, clear out any remaining debris from last year’s garden. Remove fallen leaves, dead annuals, and any leftover plant matter that may be harboring pests or diseases. Be careful not to compost anything that looks diseased—toss those materials in the trash to avoid contaminating future plantings.
If you left perennials untrimmed for winter interest or pollinator habitat, now is the time to cut them back to make room for fresh growth.

Check your garden beds for signs of winter damage. Raised beds may need new corner supports or additional soil. In-ground beds might benefit from edging or a top-up of compost. Remove any weeds that have sprouted during the winter months—this is easier when the soil is damp and roots release more readily.
This is also a good time to check on your mulch. If it’s compacted or has thinned out, plan to replenish it after planting to help conserve moisture and suppress weeds.
Healthy soil is the foundation of a thriving garden. Use a simple soil test kit to check the pH and nutrient levels in your beds. Based on the results, you may need to add compost, lime, sulfur, or a balanced organic fertilizer to prepare your soil for the season.
Adding amendments now gives them time to break down and integrate with the soil. Lightly till or mix them into the top few inches of soil, being careful not to disturb the soil structure too much, especially if your soil is still wet.
Before adding compost or refreshing barkdust, take a moment to evaluate how your yard handled the winter rain. After a steady storm, notice where water collects and how long it lingers. Soggy low spots, washed-out mulch, shifting gravel, or pooling near the foundation are signs that water isn’t moving efficiently through your landscape.
Spring is the ideal time to spot these issues while the ground is still saturated. Addressing drainage concerns early helps protect plant roots, prevent erosion, and ensure that any soil amendments or mulch you apply will perform the way they should throughout the growing season.

Late winter to early spring is an ideal time to prune many trees and shrubs, especially fruit trees and flowering bushes that bloom on new growth. Remove any damaged or diseased branches, and thin out crowded areas to allow for better airflow and shape.
Be careful not to prune spring-flowering shrubs like lilacs or forsythia just yet—these bloom on old wood, and pruning too early may reduce blooms.
This is also a good time to check on your mulch. If it’s compacted or has thinned out, plan to replenish it after planting to help conserve moisture and suppress weeds. Not to mention having a quality mulch will add to the overall aesthetic of your landscaping. If you can’t decide which mulch or bark to use, please give us a call and we’ll be happy to discuss the best options and provide recommendations.
Schlegel Barkdust has provided high-quality gardening and landscaping supplies for over 20 years. We are proud to be a family-owned business and love helping our customers create their dream yards. If you are thinking of getting some compost or mulch for your yard, give us a call or check out our materials calculator to learn exactly how much you need!
Fall in Oregon may bring cooler temperatures and more frequent rain, but it doesn’t mean your garden has to go dormant. In fact, autumn is one of the best times to prepare your landscape for the months ahead. Whether you're extending your harvest, planting for spring, or simply tidying up after a busy summer season, a little attention now can lead to big rewards later.
Here are a few fall gardening tips to keep your outdoor space healthy, productive, and beautiful year-round.
As your summer vegetables and annuals finish producing, fall is the perfect time to clear out your garden beds. Remove spent plants, weeds, and any fallen fruit to help prevent overwintering pests and diseases. Most of this organic matter can be added to your compost pile, where it will break down over winter and enrich your soil in the spring.
Perennial plants also benefit from a little fall care. Trim back dead or diseased growth, but don’t be too quick to cut everything down. Leaving the seed heads of plants like echinacea, rudbeckia (black-eyed Susan), and ornamental grasses provides food for birds and adds visual interest throughout the winter. Waiting until after the first hard frost to do heavier pruning can also protect root systems and give beneficial insects a place to shelter.

Fall is an ideal time to test your soil's pH and nutrient levels. With test results in hand, you’ll have time to amend your soil before spring planting. Adding lime, sulfur, or organic fertilizers now gives them time to break down and improve soil structure over the winter.
Enriching your soil with compost or mulch in the fall is one of the easiest ways to set your garden up for success next season. Compost adds nutrients to the soil, improves structure, and encourages microbial activity over the winter. Spread a 1–2 inch layer over your garden beds and allow the rain to carry nutrients deep into the ground.
Mulch is equally important—it helps insulate plant roots, suppresses weeds, and prevents soil erosion during heavy rains. But, the timing of applying winter mulch is important. Check out our blog post if you are unsure about the best time to mulch your garden or other plants!

Picking the right plants is key to maintaining a productive and colorful garden through Oregon’s winters. Many cool-season vegetables can be sown or transplanted in the fall and harvested throughout winter or early spring. Hardy greens like kale, arugula, spinach, mustard greens, and collards all thrive in cold weather. Broccoli, Brussels sprouts, and winter cabbage are also great additions to a fall vegetable patch. Garlic and shallots should be planted now for a spring harvest.
For ornamental appeal, fall-blooming flowers and hardy foliage plants can bring color and texture to your garden when most others fade. Look for options like chrysanthemums, asters, pansies, and ornamental kale. These plants not only provide visual interest, but they also support late-season pollinators—an important consideration for a healthy garden ecosystem.
Fall is the ideal time to plant spring-blooming bulbs such as tulips, daffodils, and crocuses, giving them the cool soil temperatures they need to develop strong roots before winter. Aim to plant bulbs about six weeks before the ground freezes—typically late September through early November in most parts of Oregon—so they have time to establish without sprouting too early.
Choose a sunny, well-drained spot, dig holes two to three times as deep as the bulb’s height, and place them pointy side up. Once planted, cover with soil, add a light layer of mulch to protect them from extreme cold, and then let nature take care of the rest. By spring, you’ll enjoy vibrant blooms with minimal effort.
At Schlegel Barkdust, we’ve been proud to serve the gardening and landscaping needs of our community for over 20 years. As a family-owned business, we know how rewarding it is to see your garden thrive year-round—and we’re here to help you make that happen. Whether you're topping off your beds with mulch, refreshing your compost supply, or tackling a bigger fall landscape project, we have the materials and experience to support your goals.
Not sure how much mulch or compost you’ll need? Use our online materials calculator or give us a call—we’re happy to help you get started on your next gardening project.
If you are thinking of getting some winter compost or mulch for your yard, give us a call or check out our materials calculator to learn exactly how much you need!
The landscaping around your home is more than just curb appeal—it's the first impression guests receive and a reflection of your personal style. A well-maintained yard not only increases your property’s value but can also boost your mental and physical health by encouraging time spent outdoors. If you're searching for a standout addition to your landscape, decorative rock is a versatile, low-maintenance option that adds both texture and visual interest.
Before you dive into your next DIY landscaping project, it's important to properly prepare your yard—especially your lawn. Follow these steps to ensure a smooth, long-lasting decorative rock installation.
Decorative rock comes in a variety of colors, shapes, and sizes. Whether you're aiming for a natural, rugged look or something more refined, there’s a rock type that suits your vision.
Consider your overall design goals and how each rock type will perform in your specific environment.
This step is essential. Skipping it can lead to an ongoing battle with weeds growing up through your newly installed rock. Start by removing all grass, weeds, and plant roots from the area.
You have two main options for clearing the space:
Whichever method you choose, the goal is to ensure nothing grows up beneath the rocks.

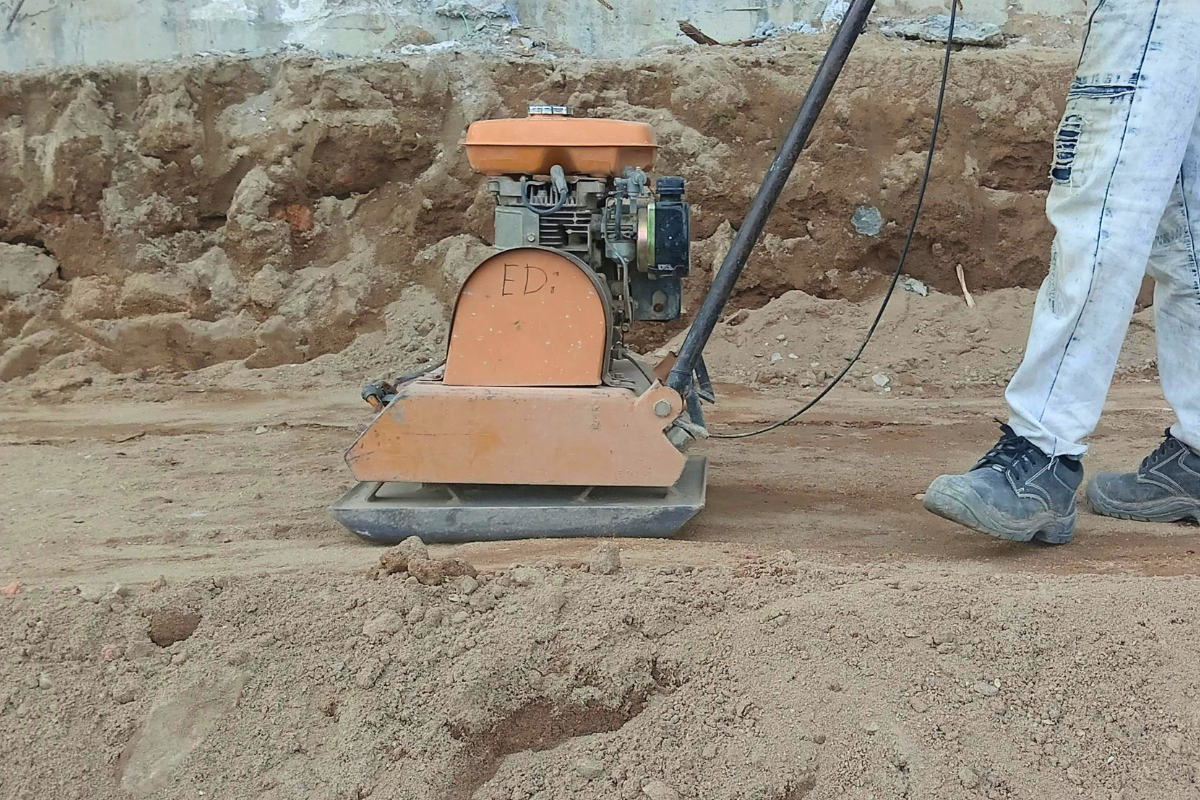
Once the weeds and grass are removed, it's important to ensure the soil underneath is firm and stable. Loose or fluffy soil can settle unevenly over time, creating dips and low spots that disrupt the look and function of your rock design. Using a hand tamper or plate compactor, compress the soil to create a solid base. This step is especially important in high-traffic areas like walkways or patios, where shifting rocks can be a tripping hazard or make the surface uncomfortable to walk on. Even in garden beds and borders, compacting the soil helps your decorative rocks stay neatly in place and prevents erosion caused by wind or rain. Taking a few extra minutes to do this can significantly improve the longevity and appearance of your project.
After clearing the area, install a layer of landscape fabric (such as geotextile) over the exposed soil. This barrier prevents weeds from growing while allowing water to drain through. It also keeps your rocks from sinking into the soil over time.
For additional protection and structure, consider installing rubber edging or metal landscape edging around the perimeter. This helps keep your rock in place during heavy rains and prevents it from spilling into other areas of your yard.
Before installing decorative rocks, evaluate how water drains in the area. Poor drainage can lead to puddling, erosion, or even damage to your home's foundation. You might need to grade the area slightly or install a French drain or dry creek bed underneath the rock layer to encourage proper water flow. Certain rocks, like river rock, can also help with managing runoff if placed strategically.

One of the most common mistakes in landscaping with decorative rock is underestimating the amount needed. Take accurate measurements of your space and use our Materials Calculator to determine how many cubic yards of rock you’ll need. Buying slightly more than you think you need ensures you won’t run short mid-project.
Whether you are installing decorative rocks, or there is another landscaping project you have been waiting to work on, Schlegel will be here to help. We understand it can be difficult to pick up your landscaping supplies, but we provide professional delivery services.
Our team delivers in multiple areas around the west side of the Portland metro area. Depending on the location of the delivery we can provide same-day service. We look forward to bringing you your landscaping supplies such as bark, rock, soil, and sand.
Looking at your yard, it’s sometimes overwhelming to think about all the upkeep. All those hours pulling weeds, watering plants, and mowing the lawn mean less time you spend enjoying your yard! Here are some tips and ideas for low-maintenance landscaping which will look great and requires minimal upkeep.

Mulch and barkdust are excellent options for covering large areas quickly while giving your yard a clean, finished appearance. Even if you don’t have many plants, a fresh layer of mulch makes existing flowers and shrubs pop.
More than just decorative, mulch also helps prevent weeds, retains soil moisture, and regulates soil temperature. Once spread, it requires very little attention. You only need to refresh your mulch or barkdust every two to four years, making it one of the lowest-maintenance landscaping tools available.
We carry barkdust and mulch in a range of colors and textures. Not sure how much to order? Use our online calculator to estimate how much you’ll need.

Rock gardens add visual interest and texture to your yard while keeping maintenance to a minimum. After the initial installation, they require little ongoing effort. Many of the plants suited for rock gardens, such as sedums and ornamental grasses, are drought-tolerant and low-maintenance.
Decorative rocks and river rock come in a variety of sizes and colors, allowing you to customize the look to fit your personal style. A well-designed rock garden stays beautiful all year round, regardless of the season.
.avif)
Gravel paths are a smart way to reduce the amount of lawn you have to mow. Like rock gardens, gravel paths are mostly a one-time project. Once installed, they can last for years with minimal upkeep. Pea gravel and crushed stone both offer natural charm and are available in multiple colors and textures.
Paths can help define different zones in your yard, guide foot traffic, and cut down on the size of your lawn. Not sure which type of gravel to use? Check out our post on choosing the right gravel for your project.
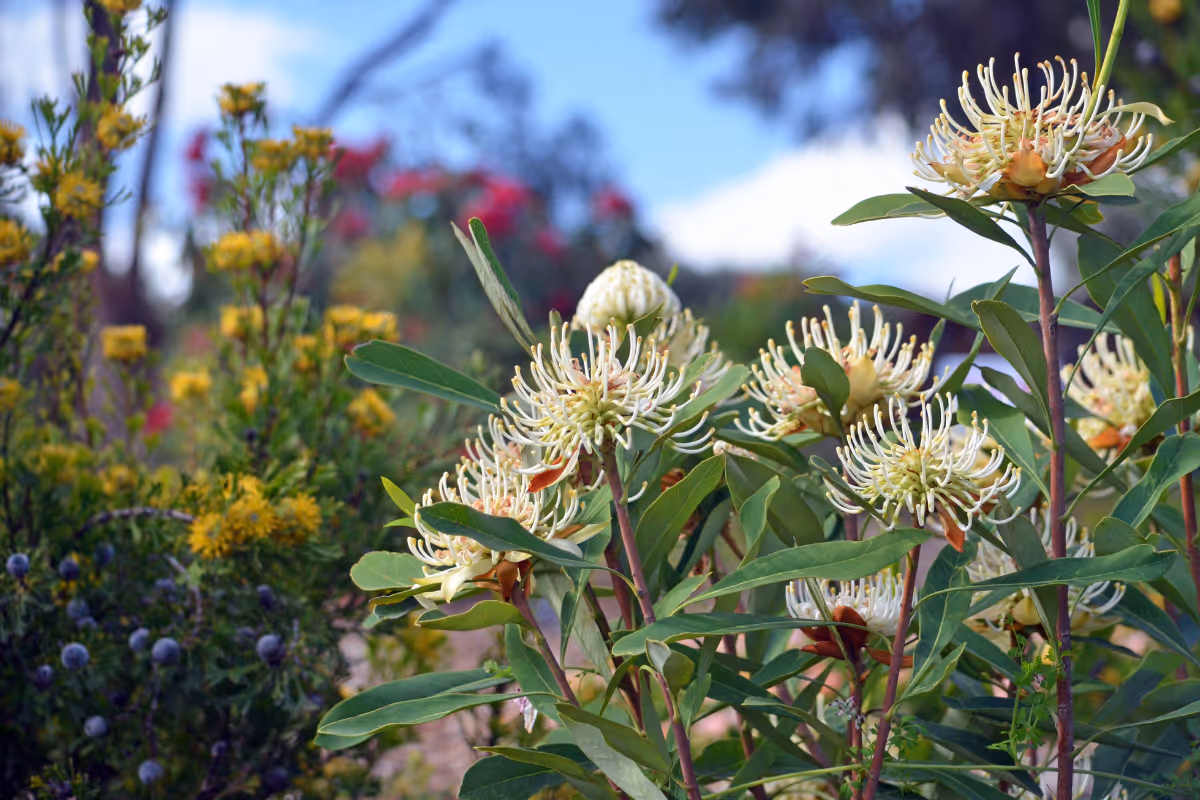
Native plants are naturally adapted to your local climate, meaning they generally require less water and fertilizer than non-native species. Once established, these plants often thrive with minimal intervention. Look for grasses, shrubs, and perennials suited to the Pacific Northwest that will thrive on rainfall alone.
Installing a landscape fabric or weed barrier beneath your mulch or gravel helps reduce weed growth even further. It’s an easy step that pays off long-term, especially in high-maintenance areas like garden beds and gravel pathways.
Whether you’re just getting started or want to upgrade your existing landscape, our team at Schlegel Barkdust & Landscape Supplies is here to help. Contact us today for product recommendations, delivery options, and expert advice.
A fresh layer of mulch can do wonders for your landscape. It gives your yard a clean, well-maintained look while helping to retain moisture, suppress weeds, and prevent soil erosion. But figuring out how much mulch to buy can be tricky. Buy too much, and you risk piling it too deep, which can suffocate your plants. Buy too little, and you may leave patches exposed, allowing weeds to creep in and reducing the benefits of mulching.
So how do you determine the right amount of mulch for your yard? It comes down to two key factors: the size of the area you’re covering and the type of mulch you’re using.
The texture of your mulch plays a role in how much you’ll need. Finer, organic mulches like compost or shredded bark provide a dense, shallow cover and are typically spread in thinner layers. Coarser mulches, such as bark chips, allow more air circulation around plants but require a deeper layer to provide full coverage.
Need help picking the right mulch? Check out our guide to mulch types we offer to find the best match for your landscaping goals.
Start by measuring the area you plan to mulch. Multiply the length by the width to get the total square footage for each section, then add those numbers together for your total area.
Next, determine your desired mulch depth:
Now it’s time to calculate how much mulch you'll need. Use this formula:
(Square feet × Depth in inches) ÷ 324 = Cubic yards needed
Why 324? One cubic yard of mulch covers 324 square feet at 1 inch deep.
We’ve made it simple! Use our Materials Calculator to quickly find out how many cubic yards of mulch your yard needs. And if you still have questions, just contact us—we’re happy to help!
Mulching is one of the most important steps you can take to support the long-term health of your landscape. It conserves moisture, regulates soil temperature, suppresses weeds, and enhances visual appeal. But just as important as choosing the right mulch is applying it at the right time. Knowing when to mulch can make a big difference in how well your plants thrive through the seasons.
As the first signs of spring emerge, it can be tempting to spread mulch early to tidy up garden beds and prepare for the growing season. However, applying mulch too soon can work against you. A thick layer of mulch can insulate the soil and prevent it from warming up, which delays plant growth and seed germination.
In Oregon, the best time to apply spring mulch is typically mid to late April, once daytime temperatures are consistently warm and the soil has begun to dry out. Starting with a thin layer—about one to two inches—is ideal. You can always top it off with more mulch later in the season once your plants are established.
Winter mulching is different in purpose—it’s all about protecting plants and soil from extreme cold. It helps insulate root systems, reduce frost heaving, and preserve soil structure. However, timing still matters.
If you mulch too early in the fall, you risk trapping heat in the soil, which can stimulate new growth right before freezing weather arrives. The best approach is to wait until after the first hard frost, when plants have entered dormancy. Use mulch as a protective blanket, especially around tender perennials, shrubs, and trees. In early spring, gradually remove the winter mulch to avoid shocking plants with sudden exposure to fluctuating temperatures.

Applying mulch at the optimal time provides multiple benefits:
Getting the timing wrong can reduce these benefits or even harm your plants:
If you’re unsure when or how to mulch your landscape, we’re here to help. Contact Schlegel Barkdust & Landscape Supplies for expert guidance and premium mulch products tailored to Oregon’s unique climate.
Whether you're maintaining a backyard garden, reworking a flower bed, or just trying to keep weeds down in your front yard, you've probably come across mulch, bark dust, and compost. These materials are often used interchangeably, but they’re not the same—and using the right one in the right place can make a big difference in the health and appearance of your landscape.
Here's what you need to know.
Mulch is a broad term for any material spread over the surface of the soil to retain moisture, suppress weeds, regulate temperature, and improve visual appeal. It can be organic (wood chips, straw, leaves) or inorganic (rubber, gravel).
Uses:
Best for: Flower beds, around trees and shrubs, and pathways where you want a clean look and long-term ground cover.
Bark dust is a specific type of organic mulch made from finely shredded or ground bark—usually from fir or hemlock trees. It’s valued for its smooth, uniform texture and deep color, making it popular for decorative landscaping.
Uses:
Best for: High-visibility areas where appearance matters, like front yards, commercial properties, or decorative beds.
Note: Bark dust is slower to break down than other mulches, so it lasts longer but doesn’t enrich the soil much on its own.
Compost is decomposed organic matter—kitchen scraps, yard waste, leaves, and manure—that’s broken down into a rich, crumbly soil amendment. It’s packed with nutrients and teeming with beneficial microbes.
Uses:
Best for: Mixing into garden beds before planting, topdressing lawns or vegetable gardens, and rejuvenating depleted soil.
Important distinction: Compost is not mulch. While you can use it as a top layer, it breaks down quickly and can encourage weed growth if not covered.
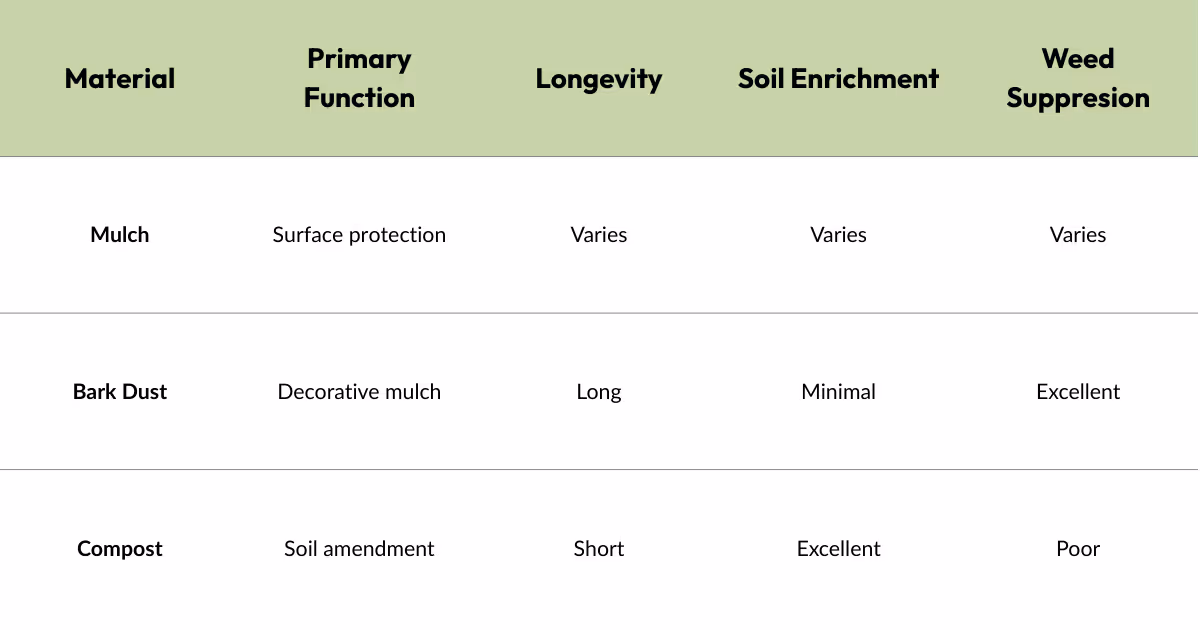
Each of these materials plays a different role in a thriving landscape. Think of compost as food for your soil, mulch as its blanket, and bark dust as the stylish coat you put on top. Use them wisely, and your plants—and your property—will thank you.
Mulch is a term for a variety of organic landscape supplies that cover your yard such as bark and compost. While mulch is often selected for its visual appeal, it also serves a number of practical purposes that make it an essential part of maintaining a healthy landscape.
Mulch acts as a protective layer over the soil, helping to improve the appearance and performance of your outdoor space. Here are a few key benefits:

Hemlock Barkdust: This fine-textured bark has a reddish-black hue and is favored for its soft feel and lower tendency to splinter, making it ideal for high-traffic garden areas.

Fir Barkdust: Fir bark offers a classic look and rich color, commonly used in both residential and commercial landscaping for a well-manicured appearance.

Cedar Chips: Naturally aromatic and long-lasting, cedar chips are a popular choice for garden paths and ornamental beds. They also offer mild pest-repelling properties.

Pebble Bark: With its orange-brown tint and chunkier texture, pebble bark brings a vibrant, natural touch to any landscape design.
To keep your landscape looking its best, mulch should be refreshed annually. Before adding new mulch, fluff the existing layer to improve air circulation and avoid compacted buildup. This also helps maintain an even look and better performance over time.
If you have questions about which mulch is right for your project or need fast and reliable delivery, contact Schlegel Barkdust & Landscape Supplies. We’re here to help you choose the best materials and keep your yard looking beautiful all year long.
At Schlegel Barkdust & Landscape Supplies, we do not offer bark blowing services—but we’re often asked about it. Bark blowing can be a convenient option for homeowners and property managers looking for a quick and easy way to apply mulch or barkdust. However, while the convenience is appealing, there are several trade-offs to consider before choosing this service.
Bark blowing involves using a large hose system to blow bark or mulch onto a landscape area. It’s especially helpful in situations where the terrain is difficult to access, such as steep hillsides, banks, or narrow pathways that would be hard to reach with a wheelbarrow or rake. If you're working on a sloped property or trying to mulch a large area quickly, bark blowing may be the best solution.
However, for more accessible areas like front yards, flower beds, or open spaces, bark blowing may not be the most cost-effective choice. The service itself often comes with a premium price tag, and one of the most common complaints we hear from customers is that they didn’t receive the full depth of bark they paid for. Whether you request two inches or four inches of bark, it’s important to verify that the coverage is even and accurate throughout the area. This is one area where doing it yourself offers more control.

Before deciding to hire a bark blowing service, ask specific questions: How thick will the layer be? What type of bark is being used? Can you inspect the area afterward to ensure complete coverage? Using our Materials Calculator, you can estimate how much bark you actually need, which helps you double-check whether you’re getting what you paid for.
The primary advantages of bark blowing are clear: it’s fast, requires no physical labor on your part, and it can access difficult areas with ease. But these benefits need to be weighed against the higher cost and potential for inconsistent application. If you’re physically able and the area is manageable, picking up bark or having it delivered and spreading it yourself could save you money while giving you peace of mind.
At Schlegel, we’re here to help you choose the best method for your landscape. Whether you’re going the DIY route or hiring a crew, we offer high-quality bark and mulch products at competitive prices.
When planning a landscaping or construction project, choosing the right type of gravel can make a big difference in the finished look and long-term performance. Two of the most commonly used materials are pea gravel and crushed stone. While they may seem similar at first glance, they serve different purposes and offer distinct advantages depending on how they’re used.

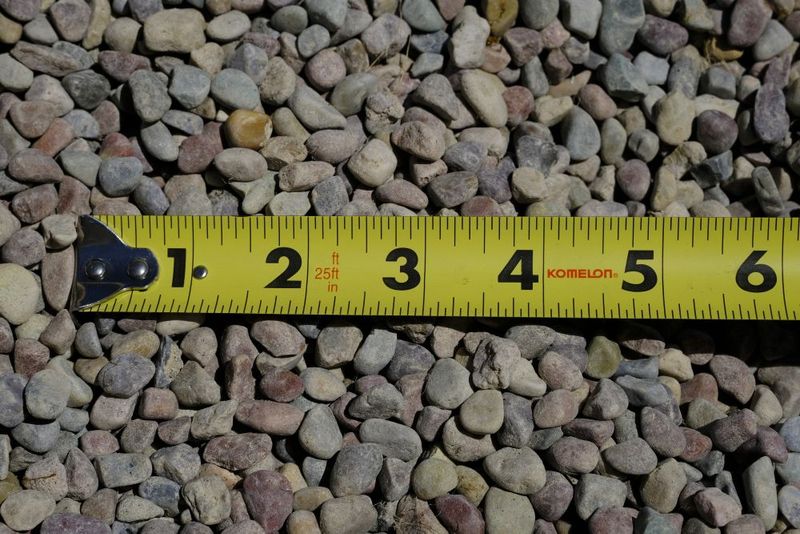
Pea Gravel is made up of small, rounded stones, usually about the size of a pea—hence the name. It has a smooth texture and comes in a range of natural colors, making it a popular choice for decorative pathways, garden borders, and around patios. Because the stones are rounded and don’t lock together, pea gravel remains loose underfoot, which gives it a pleasant, natural feel but also means it can shift easily and may require occasional raking to keep it in place.

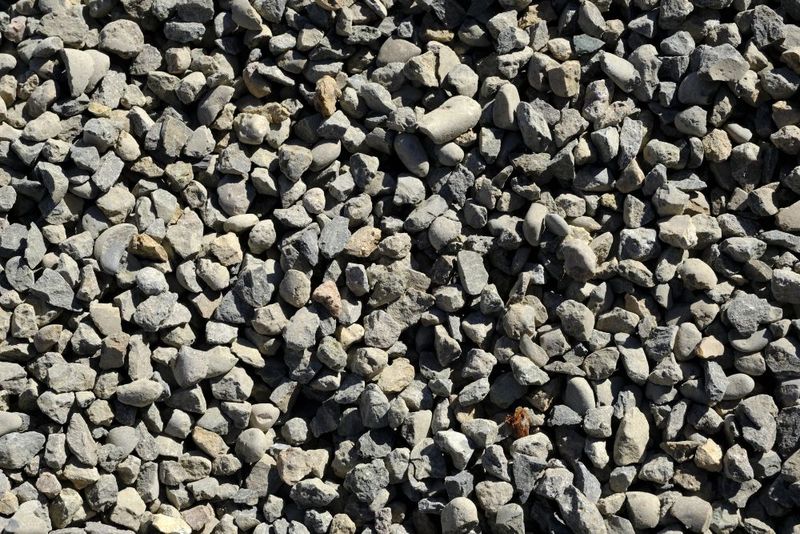
Crushed Stone, on the other hand, is produced by mechanically breaking down larger rocks into angular pieces. The sharp edges of crushed stone help the material compact more tightly, making it ideal for applications where stability is important—such as driveways, road bases, and under concrete slabs. It doesn’t move around as easily as pea gravel, which means it offers better long-term support for heavy loads or high-traffic areas.
When deciding between the two, consider both function and appearance. Pea gravel works well in spaces where comfort and aesthetics are the priority, while crushed stone is the better choice for structural strength and minimal maintenance. You might even use both materials in the same landscape, using pea gravel for pathways and crushed stone as a base layer for hardscaping.
Still unsure which one is right for your project? Contact Schlegel Barkdust & Landscape Supplies—we’re happy to help you choose the best material for your needs. Our professional employees are the experts in all things landscape supplies including crushed rock.

.png)


.png)